SpecterOps home page
Search...
⌘K
Ask AI
Support
Contact Us
Contact Us
Search...
Navigation
BloodHound Enterprise Collection
Create a BloodHound Enterprise Collector Client
Home
BloodHound
API Reference
Webinars
Community
Query Library
OpenGraph Library
Blog
Get Started with BloodHound
Introduction to BloodHound
Quickstart
Security Boundaries
Install a Data Collector
Overview
Install SharpHound
Install AzureHound
Collect Data
Overview
Collection Permissions
BloodHound Enterprise Collection
Overview
Data Reconciliation and Retention
Ad-hoc BHE Data Collection with SharpHound CE
Run an On Demand Scan
Create a BloodHound Enterprise Collector Client
Create a Data Collection Schedule
Privileged Collection in SharpHound
SharpHound Enterprise Cross-Trust Collection
SharpHound Collection FAQ
Community Edition Collection
OpenGraph
Overview
Best Practices
OpenGraph Schema
OpenGraph Custom Icons
OpenGraph API
OpenGraph Library
OpenGraph Incentive Program
OpenGraph FAQ
Analyze Attack Path Data
Overview
Privilege Zones
Posture Page
BloodHound Configuration
Accept Attack Path Findings
Search With Cypher
Supported Cypher Syntax
Explore -> Search for Objects
Manage BloodHound
Overview
BloodHound Configuration Supplement
BloodHound Enterprise Compliance Framework
Authentication and Authorization
Securing BloodHound and collectors
API & Integrations
Overview
BloodHound API
Integrations
Resources
Resources
Nodes
Edges
Glossary
Community and Support
Release Notes
Legacy BloodHound
On this page
Purpose
Prerequisites
Process
Outcome
BloodHound Enterprise Collection
Create a BloodHound Enterprise Collector Client
Purpose
This guide explains how to create a BloodHound Enterprise collector client, either of:
SharpHound Enterprise
AzureHound Enterprise
It should be used by BloodHound Enterprise (BHE) administrators when deploying SharpHound Enterprise or AzureHound Enterprise.
Prerequisites
Having deployed a BloodHound Enterprise Tenant
Logged in as a user role, which is authorized to create a new collector client, see
Administering users and roles
Process
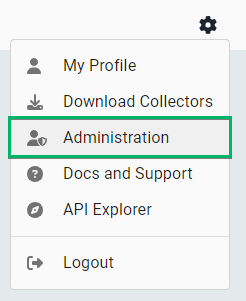
In the top right, click settings ⚙️ →
Administration
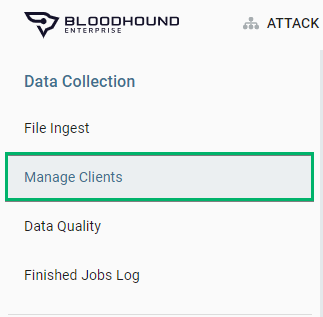
In the top left side, click
Manage Clients
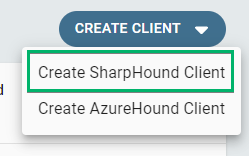
On the right side, click
Create Client
and, from the drop-down, select one of the collector clients, for example
Create SharpHound Client
In the pop-up window, for example named
New SharpHound Enterprise Client
, input the
Client Name
and click
CREATE
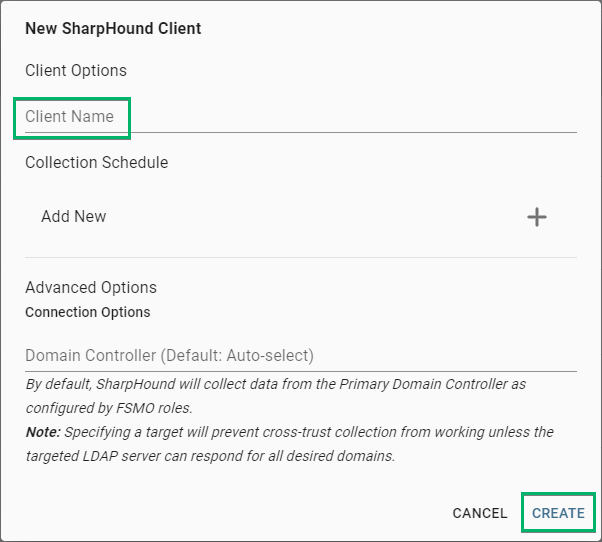
The pop-up window
Client Token Info
will appear; follow the instructions in it - save the key before clicking
CLOSE
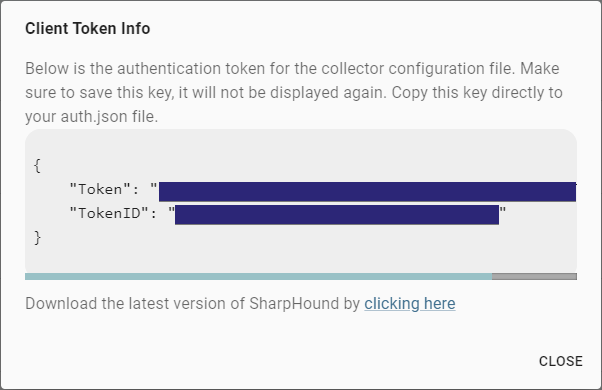
Outcome
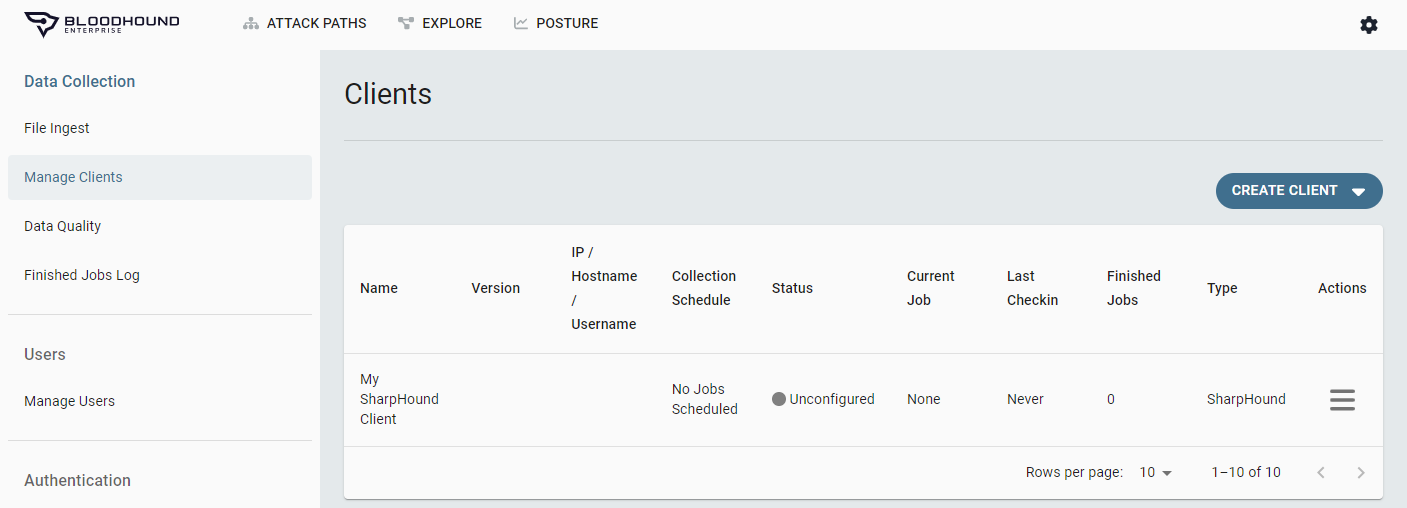
The collector client will appear in the
Manage Clients
table with a
Status
of
Unconfigured
.
Run an On Demand Scan
Create a Data Collection Schedule
Assistant
Responses are generated using AI and may contain mistakes.