Applies to BloodHound Enterprise and CE

Purpose

This article describes how to use Cypher queries to extend the basic search functionality of BloodHound. BloodHound offers a variety of prebuilt queries to help you get started. You can search and filter queries by various criteria, create and manage custom queries, and import and export queries in JSON format.

What is Cypher?

Cypher is a query language for graph databases (similar to SQL for relational databases). It uses an ASCII-art style syntax to describe nodes and relationships. If you can describe the path you’re looking for, you can write it in Cypher.
This article provides an introduction to Cypher queries in BloodHound, including how to access prebuilt queries and manage saved queries. See Write Custom Queries for more advanced information.

Quickstart

A great way to start exploring Cypher queries is through the community-driven BloodHound Query Library. This comprehensive collection includes both community-contributed queries and the prebuilt queries that are available in BloodHound. When you’re ready to explore prebuilt queries inside BloodHound, follow these steps:
1

Open the Saved Queries section

Click Explore > Cypher > Saved Queries.BloodHound displays prebuilt queries by default when you expand the Saved Queries section.
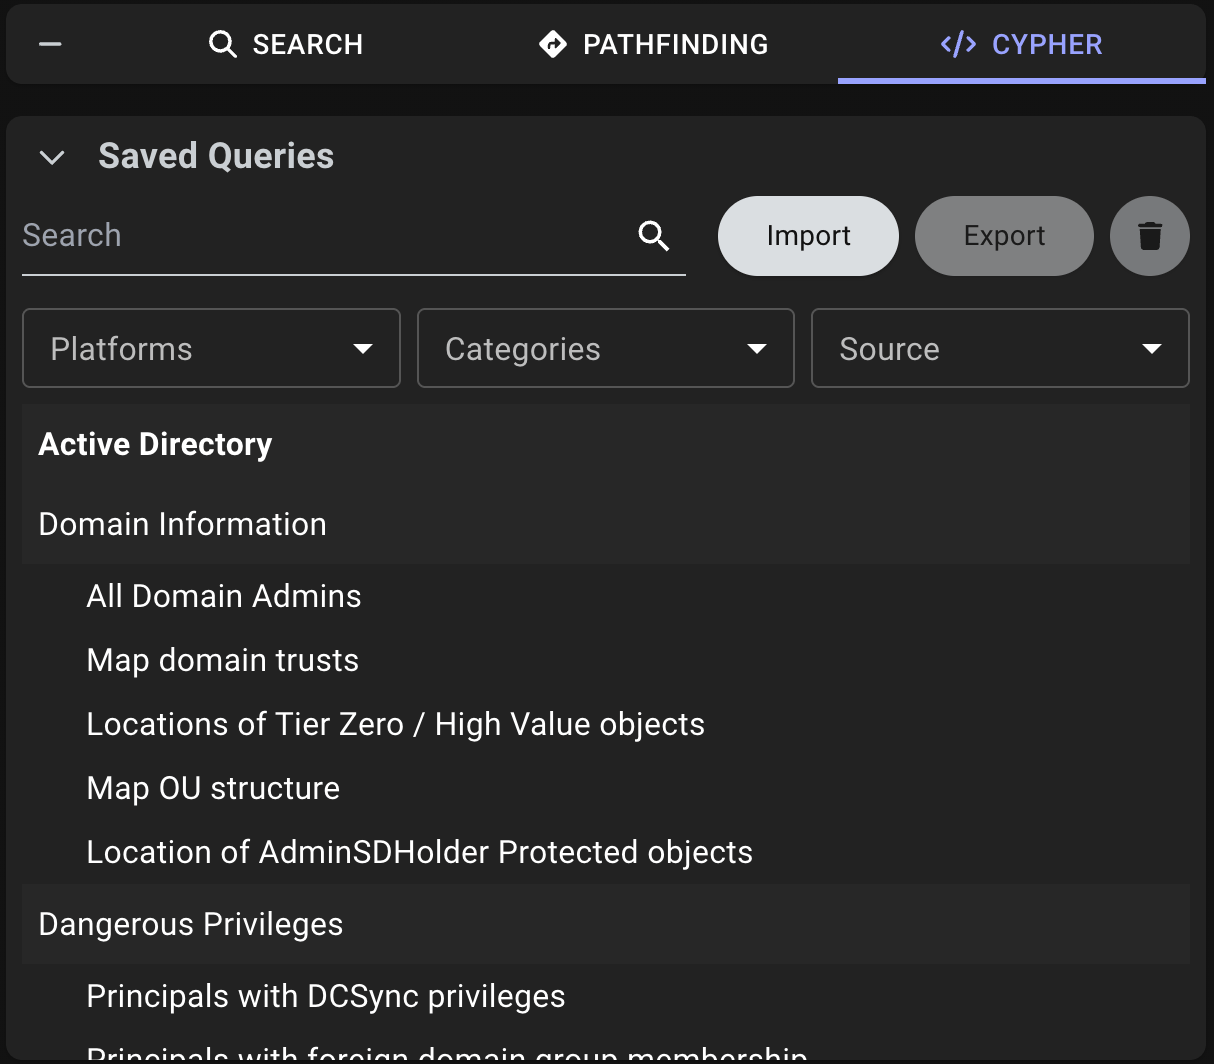
Default view of the Saved Queries section
2

Select and run a query

Select a query from the list to display the Cypher syntax and automatically run the query.
Click the Auto-run selected query checkbox if you prefer to run queries manually.
3

Review the results

Review the results in the graph view.You can modify the Cypher syntax and re-run the query to explore different relationships.

Features

BloodHound provides several features to help you work with Cypher queries. These features enable you to search and manage your queries effectively.

Search and Filter

BloodHound offers several search and filtering options to help you find the right query quickly.
Search and filter queries
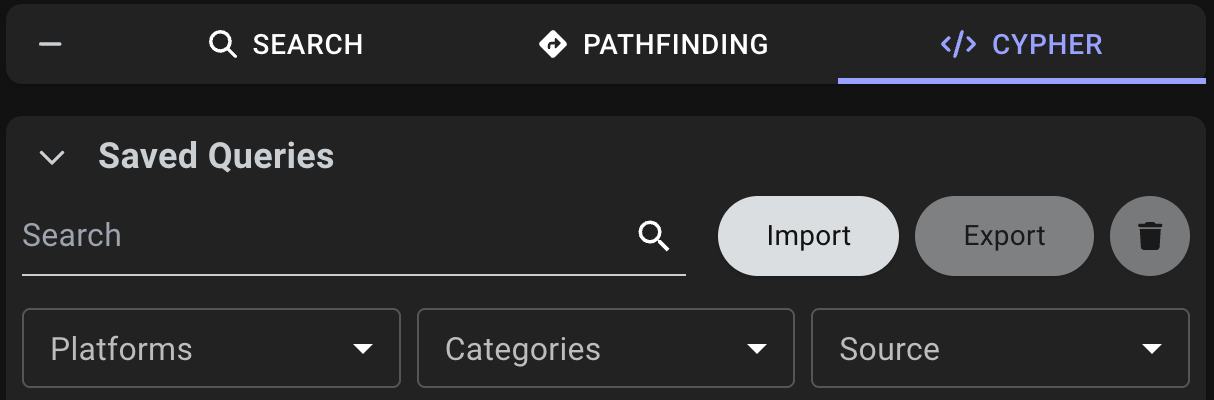
  • Search saved queries by name: Quickly locate specific queries using the search text box.
  • Filter queries: Narrow down the list of queries by selecting one of the following options:
    • Platforms: Displays queries based on the platform that they target, such as Active Directory or Azure. You can also filter to show only your saved queries.
    • Categories: Displays queries based on logical groups, such as shortest path and dangerous privileges.
    • Source: Displays queries based on their source, such as prebuilt, personal, and shared.

Create and Manage Queries

BloodHound provides several features to help you create and manage custom queries. For example, you can:
  • Save a query: Write a custom query and store it for future use.
  • Save As: Create a copy of an existing query with a new name, description, and updated parameters.
  • Share a saved query: Share your custom query with all users or specific users in your BloodHound environment.
  • Edit a saved query: Modify the Cypher syntax, metadata, and shared access of a custom query.
  • Delete saved queries: Remove custom queries that you no longer need.
You can only edit, share, and delete queries that you have created. You cannot modify prebuilt queries directly, but you can use the Save As feature to create a copy that you can then edit.
When you’re ready to create and manage custom queries, follow these steps:
1

Open the Saved Queries section

Click Explore > Cypher > Saved Queries.
2

Create or copy a query

Choose one of the following options to create a custom query:
  • Create a new custom query
  • Copy an existing query
In the query editor at the bottom of the page, write your custom query and click Save.
3

Enter query details

In the Save Query dialog, enter a unique name and description for your query.
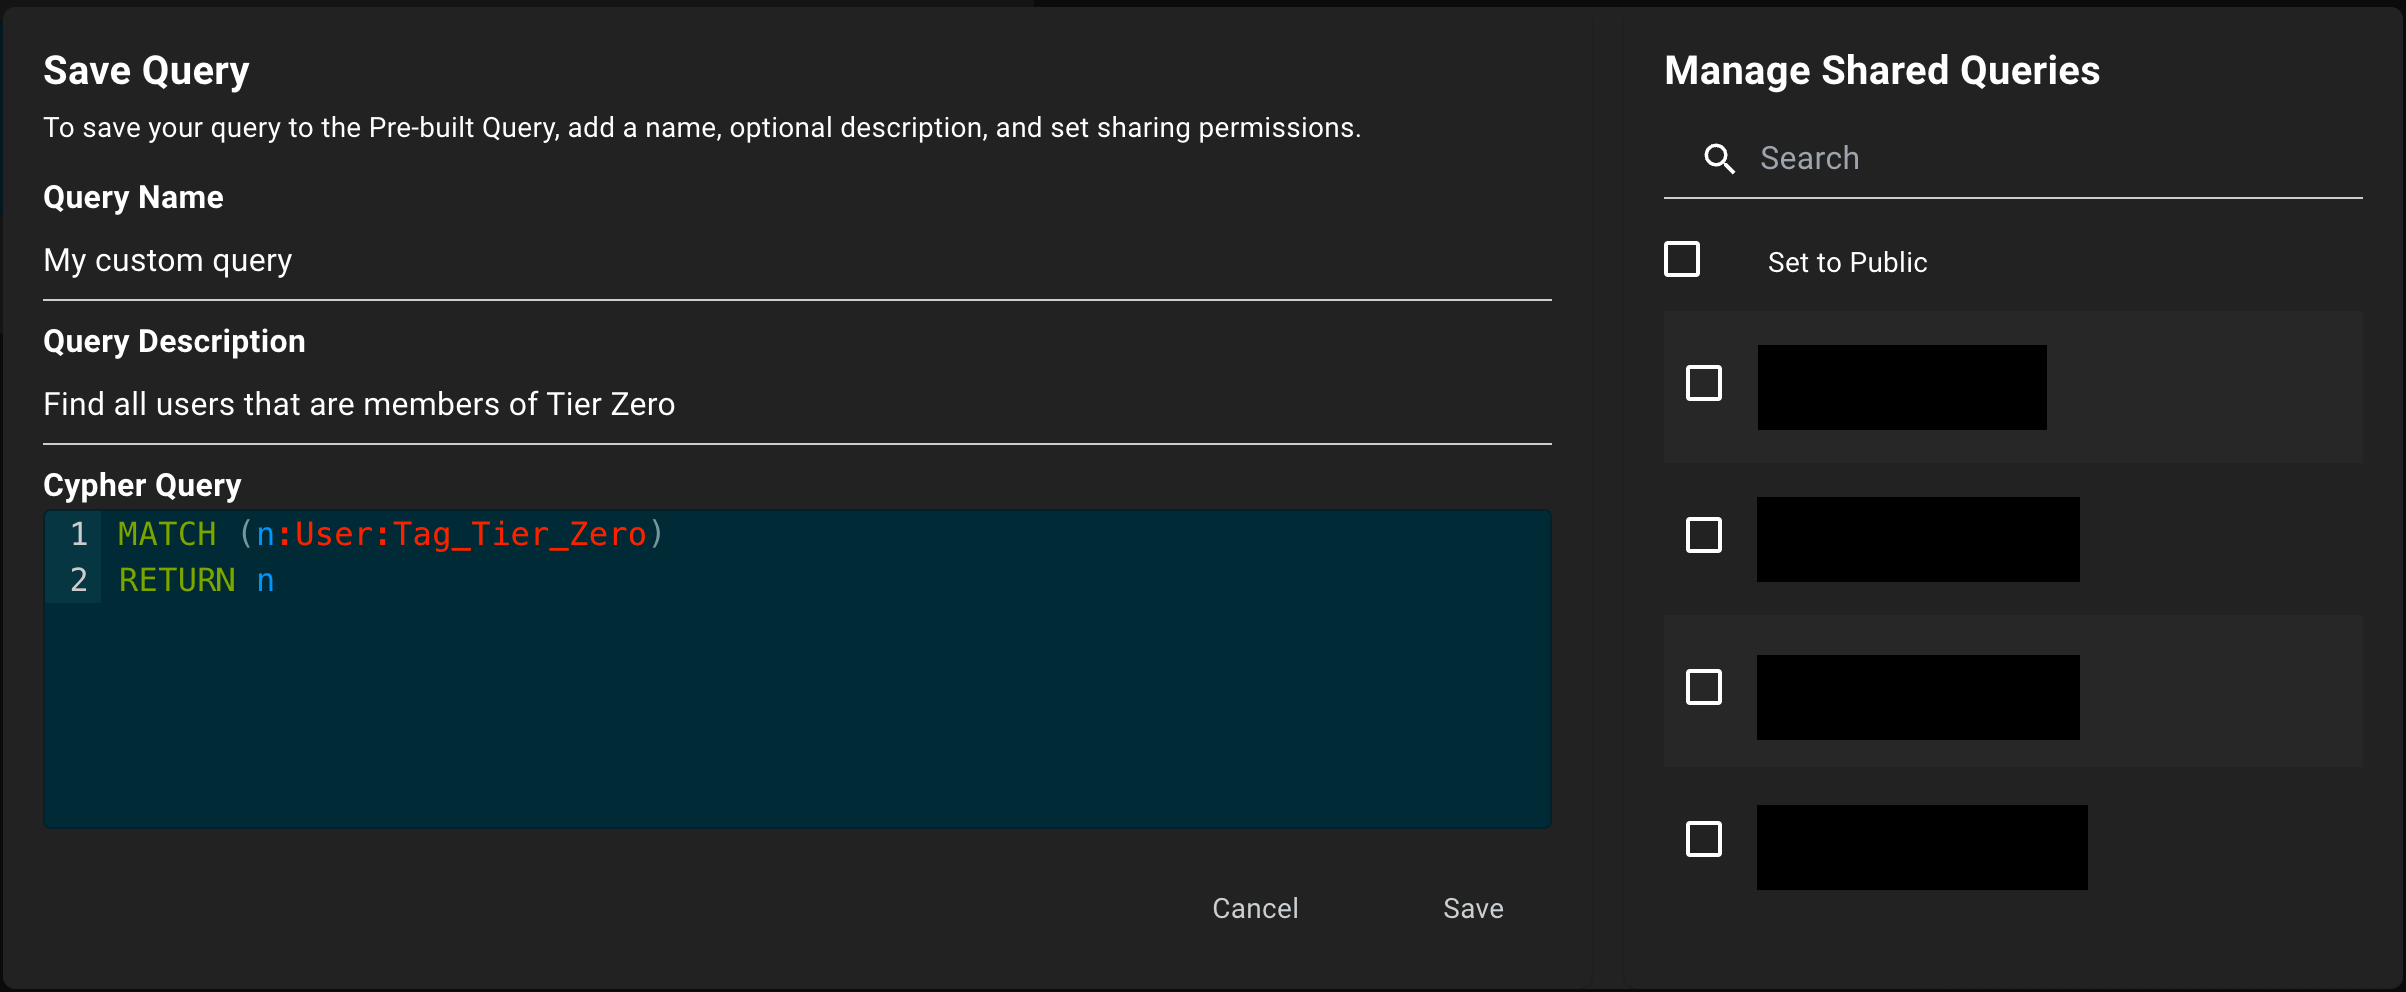
Save query dialog
4

Share your query (optional)

In the Manage Shared Queries dialog, select Set to Public to enable collaboration with all users in your BloodHound environment or select specific users. You can change these settings later if needed.
The Set to Public option restricts query editing and deletion to Admin users only.
5

Save your query

Click Save to store your custom query. It will now appear in the list of saved queries.
6

Edit or delete your query

To edit or delete your query, click the vertical ellipsis (three dots) next to the query name and select Edit/Share or Delete.
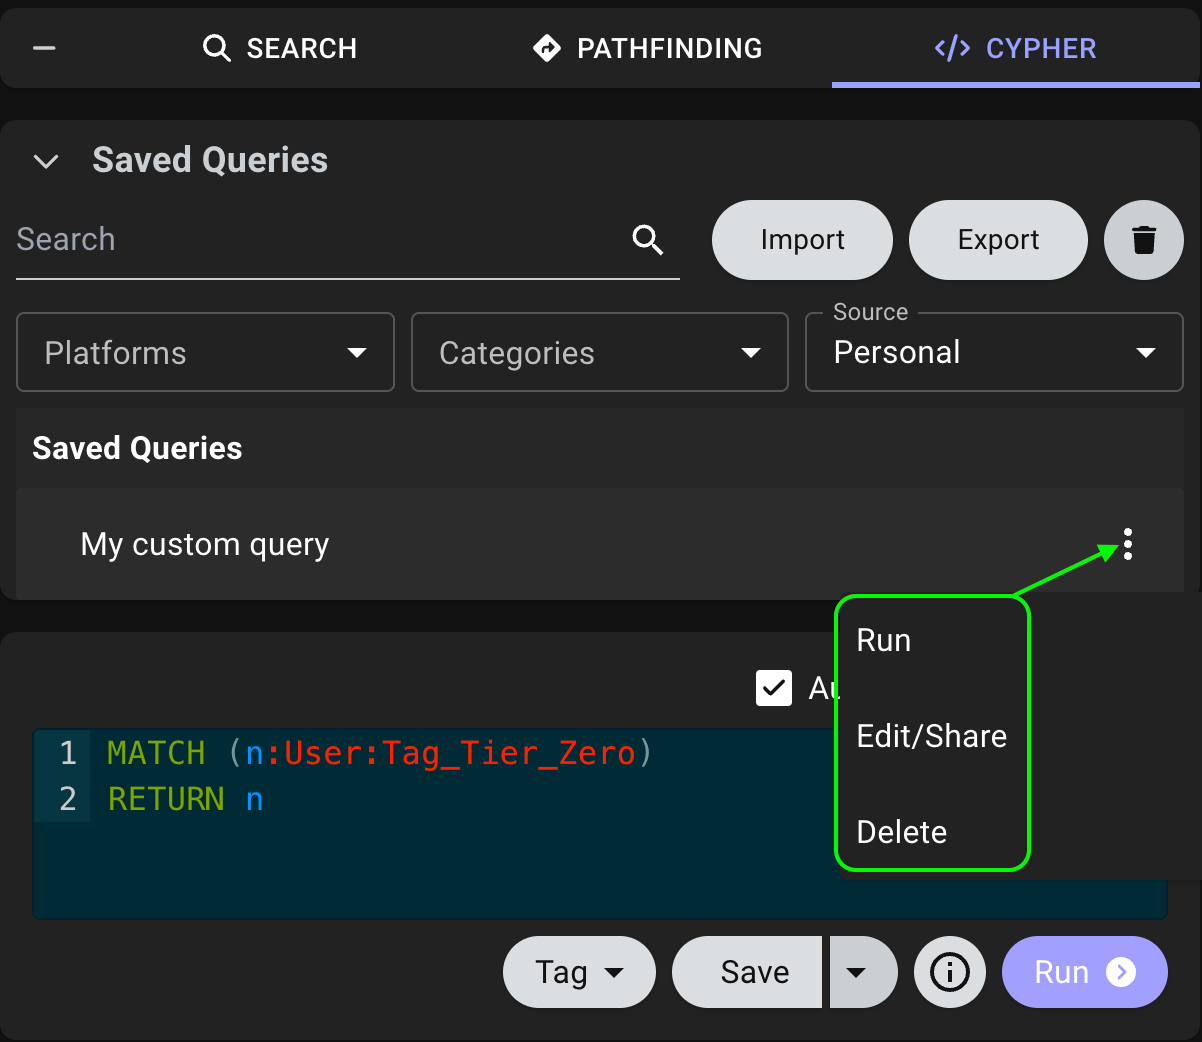
These options are available to Admin users only when query sharing is Set to Public.
Edit and delete saved queries

Import and Export

BloodHound allows you to import and export queries for easy sharing and backup.
Import and export queries
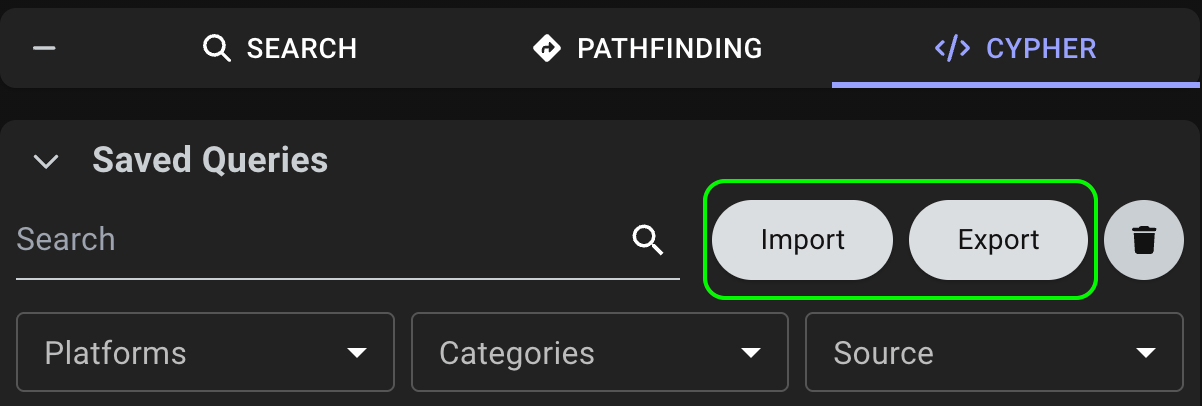
  • Import queries from JSON files: Easily add new queries by dragging and dropping JSON files or compressed JSON files into the UI. BloodHound validates the files for correct syntax and notifies you of any errors.
  • Export a saved query to a JSON file: Share or back up your queries by exporting them in JSON format. Export is available for saved queries only. You cannot export prebuilt queries directly.

Write Custom Queries

One of the most overlooked features of BloodHound is the ability to enter raw Cypher queries directly into the user interface. Likely, a lot of that has to do with the fact that it’s not a very emphasized feature and requires learning Cypher. However, with some work, using raw Cypher queries can let you manipulate and examine BloodHound data in custom ways to help you further understand your network or identify interesting relationships. Writing Cypher queries unlocks powerful, custom analyses — from simple lookups to complex identity attack-path problems. Examples of what you can answer with queries include:
  • “Which users haven’t reset their passwords in 180 days?”
  • “Which low-privileged users can reach machines hosting an unconstrained gMSA?”
  • “What are the shortest paths from low-privilege users to Domain Admins?”
Cypher query editor

Elements of the graph database

Everything in the graph database is represented using common terms from graph theory, particularly edges, and nodes. Nodes represent discrete objects that can be acted upon when moving through an environment. In BloodHound, a node can, for example, represent a User in an Active Directory environment. Read more about BloodHound nodes in About BloodHound Nodes. Edges represent a relationship between two nodes and can be the action necessary to act on a node. In BloodHound, an edge can, for example, represent the relationship between a User node and a Group node through the MemberOf edge, indicating that the user is a group member. Read more about BloodHound edges in the article About BloodHound Edges. Together, edges and nodes create the paths we use in BloodHound to demonstrate how different permissions in Active Directory and Azure can be executed to gain control over a given target.

Basic Cypher

When building Cypher queries, it’s important to note that you’re generally trying to build a path using the relationships available to you. Let’s look at an extremely basic query:
MATCH (B)-[A]->(R)
RETURN B
Let’s break down how this Cypher query is constructed. When querying the database, we start our queries with the MATCH keyword. The MATCH clause lets you specify a pattern in the database.
  • Each variable in the Cypher query is defined using an identifier, in this case, the following ones: B, A, and R. The identifier for variables can be anything you want, including entire words, such as ‘groups’.
  • In Cypher queries, nodes are specified using parentheses, so B and R are nodes in the sample query above.
  • Relationships are specified using brackets, so in this example, A represents relationships.
The dashes between the nodes and relationships can be used to specify direction. Relationships in BloodHound always go in the direction of compromise or further privilege, whether through group membership or user credentials from a session. In the above query, the -> specifies that the query should return relationships that go from B to R. Removing the > will allow the query to search relationships in both directions. Finally, the RETURN statement instructs the database to return the item matched with the corresponding variable name B. Now, let’s take our previous query and make it a bit more complex:
MATCH (n:User),(m:Group)
MATCH p=(n)-[r:MemberOf*1..3]->(m)
RETURN p
This query is a bit more refined than the previous one. By using labels on both nodes and edges, we can make our query a lot more specific. We also pre-assign the variables n and m and give them labels to make the query easier to read. In this particular case, we’re asking BloodHound to find nodes with the labels User and Group, and then match those nodes using the MemberOf relationship. We added a length modifier as well to the relationship. Adding *1..3 limits the search to relationships that are between one and three links. In simple terms, give me any users that are a member of a group up to three links away. Additionally, we’re assigning the result of the pattern to the variable p and returning that variable. When we get p back, it will contain the result of each path it can find that matches our pattern we asked for. Now that we’ve looked at the basic building blocks of queries, let’s look at a more complicated one. As an example, here’s the query we use to calculate shortest paths to Domain Admins, one of the most important queries in the BloodHound interface:
MATCH p=shortestPath((n:User)-[*1..]->(m:Group))
WHERE m.name = "DOMAIN ADMINS@INTERNAL.LOCAL"
RETURN p
Cypher is case-sensitive, and the node property “name” is always all uppercase and postfixed with the directory’s domain. In the code above, “Domain Admins” in the domain “internal.local” has become “DOMAIN ADMINS@INTERNAL.LOCAL.
In this query, we add a few more elements to our previous ones. We still use labels to specify our nodes, but we also add another degree of specificity to our group node by restricting the group nodes that can be returned to only the DOMAIN ADMINS@INTERNAL.LOCAL by specifying the name parameter. We also use the shortestPath function. Using this function, we ask the graph to give us the shortest path it can find between each node n and the Domain Admins group. Because we didn’t specify any relationship labels, the query will use any possible relationship it can find. We also removed the limit on how many hops the database can search. By not specifying an upper limit, the database will go as many hops as possible to find a path. There is also an allShortestPaths function available, which, as the name implies, will find every shortest path from each node to your target. Note that this results in more data analysis to perform the query and could result in higher resource consumption. Another important part of Cypher to note is that wildcard matches are possible using regex, although the syntax for the query changes slightly. As an example, here’s the query that’s run each time you type a letter in the search bar:
MATCH (n)
WHERE n.name =~ "(?i).*searchterm.*"
RETURN n
LIMIT 10
In this query, we ask the graph to return any nodes of any type that match the search term given. The (?i) tells the graph this is a case-insensitive regex, with the .* on each side indicating that we want to match anything on either side. We limit the number of items returned to the first ten using the LIMIT keyword.

Advanced Concepts

As you build into more complicated queries, the WITH keyword will become important. The WITH keyword allows you to use multiple queries and pass the results of each query to the next step. An example of this is in the BloodHound interface whenever you click on a group node. The “Session” section displays the number of places where users in this group (including its subgroups) currently have sessions. The UI calculates the number of sessions for the group using two separate queries put together:
MATCH p=shortestPath((m:User)-[r:MemberOf*1..]->(n:Group))
WHERE n.name = "$name_of_group"
WITH m
MATCH q=((m)<-[:HasSession]-(o:Computer))
RETURN count(o)
This query looks more complicated than we had before, so let’s break it down into two components.
MATCH p=shortestPath((m:User)-[r:MemberOf*1..]->(n:Group))
WHERE n.name = "$name_of_group"
This is the first query we run. We ask BloodHound to find the shortestPath possible from any user node to the group we specify. Note that we allow the MemberOf relationship to span any number of hops, allowing us to include users inside nested groups. This first query gives us all the effective members of the group we ask for.
MATCH q=((m)<-[:HasSession]-(o:Computer))
RETURN count(o)
This is the second query that actually gives us the session data. The variable m is carried over from the previous query and contains all the users relevant to the group we’re attempting to find sessions for. We ask BloodHound to find any computer where any of the users we found in the first step has a session using the HasSession relationship. We’re not interested in returning the relationships in this particular case, so we don’t assign a variable. Finally, we return the count of the number of computers we have sessions on. The two queries we execute are joined together using the WITH keyword. When using the keyword, you specify any variables you want to carry over from the previous part of the query. These variables will be available with the data for the next query in your chain.

Outcome

Now that we’ve explained Cypher and the syntax and all the cool ways you can narrow down search results, the next step is for you to build some new and interesting queries and start examining how you can view relationships.