Windows
Install AzureHound Enterprise on Windows
This shows how to install AzureHound Enterprise as a service. Many organizations choose to run AzureHound Enterprise alongside SharpHound Enterprise from the same system. These services can live alongside each other and will not conflict. Organizations who wish to run multiple AzureHound Enterprise collectors on the same server, for example, because of multiple Azure tenants, must install AzureHound Enterprise as Scheduled Tasks instead of Windows Services. See Setting up multiple AzureHound collectors on the same server with scheduled tasks.- Follow the article Create an AzureHound Configuration to create a configuration file.
- Create a directory for the AzureHound service binary. We recommend using “C:\Program Files\AzureHound Enterprise” as the Program Files directory is write-protected from non-administrative users.
- Move “azurehound.exe” into the created directory
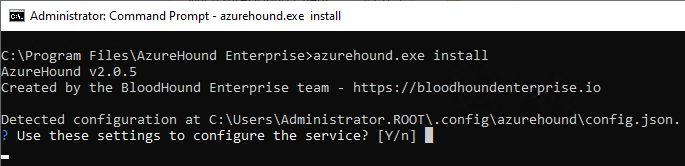
- Open a command line as a local administrator, navigate to the created directory, and run:
- Hit Enter, or type ‘y’, to use the previously created configuration file.
- AzureHound will copy the configuration settings in your user profile to “C:\ProgramData\AzureHound\config.json”, this is a hard-coded configuration file location
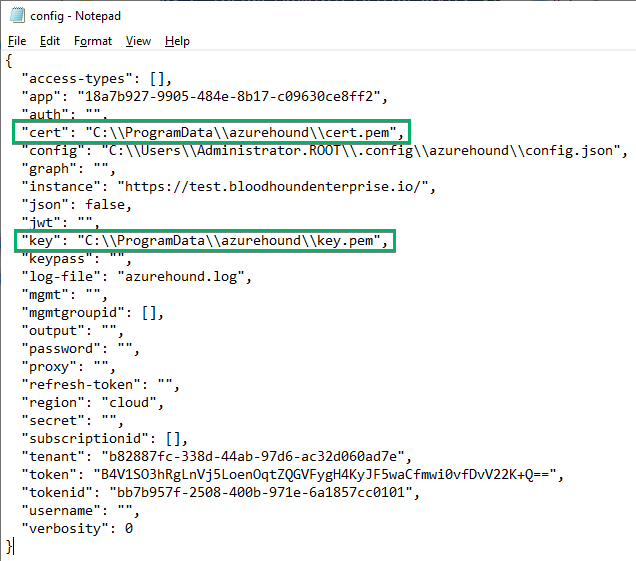
- If using certificate authentication:
- Copy the certificate and key file created in your user profile to a more central location, for example next to the configuration settings in “C:\ProgramData\azurehound”
- Edit the configuration file in “C:\ProgramData\AzureHound\config.json” and change the “cert” and “key” values to the new certificate and key file locations.
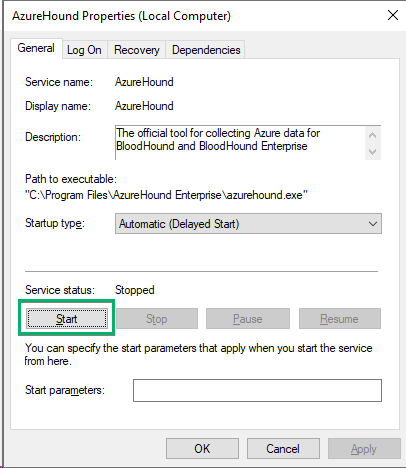
- Start the “AzureHound” service:

- If configured correctly, the collector client in BloodHound Enterprise will show “Status: Ready”, and “Last Checkin: a few seconds ago”

Upgrade AzureHound Enterprise on Windows
Upgrading AzureHound Enterprise is done by replacing the previous service binary.- Log into your BloodHound Enterprise tenant.
- Click ⚙️ → Download Collectors
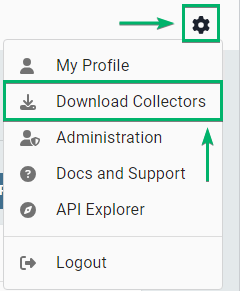
- Download AzureHound Enterprise by clicking the button DOWNLOAD AZUREHOUND vX.X.X (.ZIP)

- Extract the contents of the zip archive and locate the binary suitable for your system’s architecture
- Log into the server running your AzureHound service
- Click “Start” and then locate the “Services” application or run “services.msc”
- Locate the AzureHound service and open its properties
- From the service properties window, stop AzureHound by clicking Stop
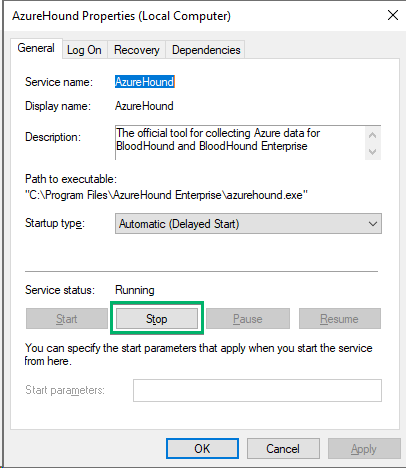
- Replace the existing “azurehound.exe” binary seen in “Path to executable” with the newly downloaded one
- From the service properties window, start AzureHound by clicking Start
Single run of AzureHound Enterprise on Windows
Instead of installing AzureHound as a service, it is also possible to run AzureHound a single time which runs until the command line is closed or the user logs off. This is often used in troubleshooting scenarios.- Follow the article Create an AzureHound Configuration to create a configuration file.
- Open a command line as a local administrator, navigate to the directory containing AzureHound Enterprise, and run:
- If the connection to BloodHound Enterprise is successful, the program will output “Waiting for jobs…”.
- In BloodHound Enterprise, the AzureHound collector client will now show “Status: Ready”, and “Last Checkin: a few seconds ago”

- If needing to test AzureHound’s connectivity to Azure; keep the command prompt open and follow Run an On Demand Scan
- When started and AzureHound has fetched the job, the command line will output data while the collection is running.
- If successful, the final message will be “Collection completed successfully”
- If unsuccessful, check the log for errors, or check the AzureHound log generated next to the binary, or contact the BloodHound Enterprise team for support.


Docker
Run AzureHound Enterprise on Docker
- Use the attached sample file: docker-compose.yaml (397 Bytes)
- Integrate the appropriate structure into your existing configuration or utilize it as a new configuration in Docker, moving the associated config.json, cert.pem, and key.pem files to the appropriate location, and updating config.json according to your assigned values.
- In your docker directory, run:
- Review the container logs and BloodHound Enterprise user interface to verify that AzureHound has successfully connected.
Upgrade AzureHound Enterprise on Docker
- In your docker directory, run:
- Review the container logs and BloodHound Enterprise user interface to verify that AzureHound has successfully connected.
Kubernetes
Run AzureHound Enterprise on Kubernetes
- Create TLS secret for certificate and key using
- Create a generic secret. Choose between:
- No passphrase:
- Private key has passphrase:
- A sample deployment.yaml file is attached to this article.
- Edit the provided deployment.yaml file. Read comments and replace instances of [ INSERT HERE ] with appropriate values
- Deploy AzureHound on k8s:
- Review the container logs and BloodHound Enterprise user interface to verify that AzureHound has successfully connected.
Upgrade AzureHound Enterprise on Kubernetes
- On your Kubernetes cluster, run: kubectl rollout restart deployment/azurehound-deployment
- Review the container logs and BloodHound Enterprise user interface to verify that AzureHound has successfully connected.
- docker-compose.yaml (397 Bytes)
- deployment.yaml (2 KB)