Purpose
This article outlines how to accept a principal in an attack path finding so it is hidden in the principal table of the finding. It should be used by BHE users whenever a risk has been decided to be accepted or while waiting for a change to leave its retention period.Prerequisites
- Logged in as a user role that is authorized to accept attack path impacted principals, see Administering users and roles.
Process
Accept a principal finding
- Navigate to the Attack Paths page.
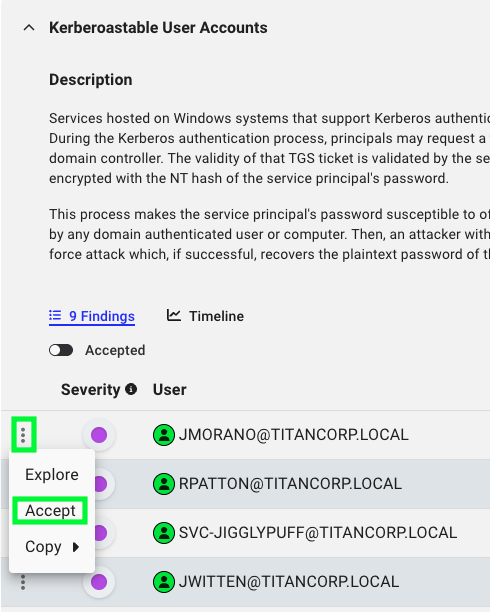
- Expand the attack path finding and click the menu to the left of the principal’s name (three vertical dots), then click `Accept`.

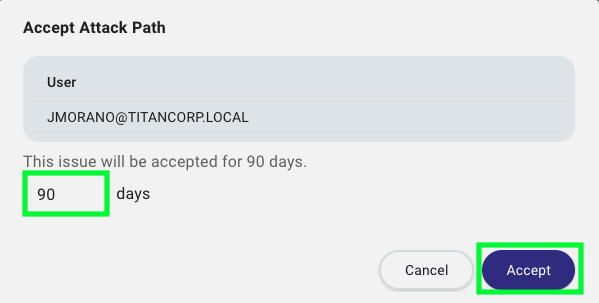
- In the pop-up window `Accept Attack Path`, set the number of days the finding’s principal should be accepted and click the button `Accept`.
- If accepting permanently: set the duration for a long duration.
- If accepting while waiting for a change to leave its retention period: set the duration depending on the retention scenario. For example, when accepting a principal from `Logons from Tier Zero Users`, the duration should be 7 days. See Data reconciliation and retention in BloodHound Enterprise.

Remove Acceptance
- Navigate to the Attack Paths page.
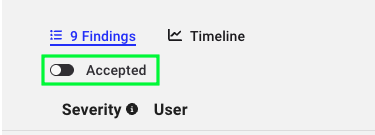
- Expand the attack path finding and toggle the setting `Accepted`.

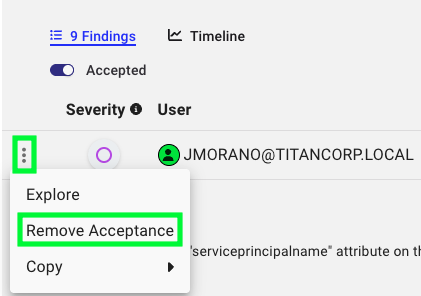
- In the menu to the left of the accepted principal’s name (three vertical dots), click `Remove Acceptance`.

- In the pop-up window `Remove Attack Path Acceptance` click the button `Remove Acceptance`.

Outcome
When a principal is accepted, it is hidden from the principal table in the attack path until you toggle the setting `Accepted`. The principal and its edges will still be visible in the Explore and Posture pages.