> ## Documentation Index
> Fetch the complete documentation index at: https://bloodhound.specterops.io/llms.txt
> Use this file to discover all available pages before exploring further.
# Custom Icons
> Define custom icons and colors for OpenGraph node kinds.
 To help visually differentiate your OpenGraph nodes in BloodHound, you can define custom icons and colors. The method for doing so depends on whether your extension produces a generic graph or a structured graph:
* **Generic graphs**: Use the [`POST /api/v2/custom-nodes`](/reference/custom-node-management/create-custom-nodes) API endpoint to define custom icons and colors.
* **Structured graphs**: Define icons and colors directly in the [`node_kinds`](/opengraph/developer/graph-definition#node_kinds) array of your extension definition schema.
## Icon options
BloodHound supports the full free, solid icon set from Font Awesome. View available icons on the [official Font Awesome docs](https://fontawesome.com/search?o=r\&ic=free\&s=solid).
When specifying an icon:
* Use the Font Awesome icon name without any prefix, for example `house` or `smile` (not `fa-house` or `fas-house`).
* Optionally specify a color per node kind. Acceptable values are `#RGB` or `#RRGGBB`.
* If an icon name cannot be resolved, BloodHound renders a `(?)` icon. Use the `PUT /api/v2/custom-nodes` endpoint to correct invalid mappings.
## Examples
The following examples show how to define custom icons for OpenGraph node kinds using an extension definition schema, the API Explorer, and a Python script.
### Extension definition schema
For structured graphs, define icons and colors directly in the [`node_kinds`](/opengraph/developer/graph-definition#node_kinds) array of your extension definition schema.
```json theme={null}
{
"node_kinds": [
{
"name": "example_Person",
"display_name": "Person",
"description": "A person in the graph",
"icon": "user",
"color": "#2299FF"
},
{
"name": "example_Device",
"display_name": "Device",
"description": "A device in the graph",
"icon": "desktop",
"color": "#00AA55"
}
]
}
```
### Direct API call
The following example request payload defines custom icons for three node kinds (`person`, `device`, and `alert`).
Use this payload with the [`POST /api/v2/custom-nodes`](/reference/custom-node-management/create-custom-nodes) endpoint to create custom node icon mappings.
```json POST /api/v2/custom-nodes theme={null}
{
"custom_types": {
"person": {
"icon": {
"type": "font-awesome",
"name": "user",
"color": "#2299FF"
}
},
"device": {
"icon": {
"type": "font-awesome",
"name": "desktop"
}
},
"alert": {
"icon": {
"type": "font-awesome",
"name": "house"
}
}
}
}
```
### BloodHound API Explorer
You can set custom icons directly from the BloodHound **API Explorer** without writing any code.
Navigate to the API Explorer from the BloodHound menu.
To help visually differentiate your OpenGraph nodes in BloodHound, you can define custom icons and colors. The method for doing so depends on whether your extension produces a generic graph or a structured graph:
* **Generic graphs**: Use the [`POST /api/v2/custom-nodes`](/reference/custom-node-management/create-custom-nodes) API endpoint to define custom icons and colors.
* **Structured graphs**: Define icons and colors directly in the [`node_kinds`](/opengraph/developer/graph-definition#node_kinds) array of your extension definition schema.
## Icon options
BloodHound supports the full free, solid icon set from Font Awesome. View available icons on the [official Font Awesome docs](https://fontawesome.com/search?o=r\&ic=free\&s=solid).
When specifying an icon:
* Use the Font Awesome icon name without any prefix, for example `house` or `smile` (not `fa-house` or `fas-house`).
* Optionally specify a color per node kind. Acceptable values are `#RGB` or `#RRGGBB`.
* If an icon name cannot be resolved, BloodHound renders a `(?)` icon. Use the `PUT /api/v2/custom-nodes` endpoint to correct invalid mappings.
## Examples
The following examples show how to define custom icons for OpenGraph node kinds using an extension definition schema, the API Explorer, and a Python script.
### Extension definition schema
For structured graphs, define icons and colors directly in the [`node_kinds`](/opengraph/developer/graph-definition#node_kinds) array of your extension definition schema.
```json theme={null}
{
"node_kinds": [
{
"name": "example_Person",
"display_name": "Person",
"description": "A person in the graph",
"icon": "user",
"color": "#2299FF"
},
{
"name": "example_Device",
"display_name": "Device",
"description": "A device in the graph",
"icon": "desktop",
"color": "#00AA55"
}
]
}
```
### Direct API call
The following example request payload defines custom icons for three node kinds (`person`, `device`, and `alert`).
Use this payload with the [`POST /api/v2/custom-nodes`](/reference/custom-node-management/create-custom-nodes) endpoint to create custom node icon mappings.
```json POST /api/v2/custom-nodes theme={null}
{
"custom_types": {
"person": {
"icon": {
"type": "font-awesome",
"name": "user",
"color": "#2299FF"
}
},
"device": {
"icon": {
"type": "font-awesome",
"name": "desktop"
}
},
"alert": {
"icon": {
"type": "font-awesome",
"name": "house"
}
}
}
}
```
### BloodHound API Explorer
You can set custom icons directly from the BloodHound **API Explorer** without writing any code.
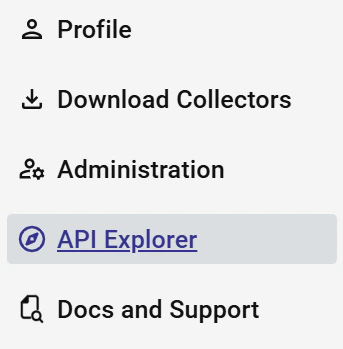
Navigate to the API Explorer from the BloodHound menu.
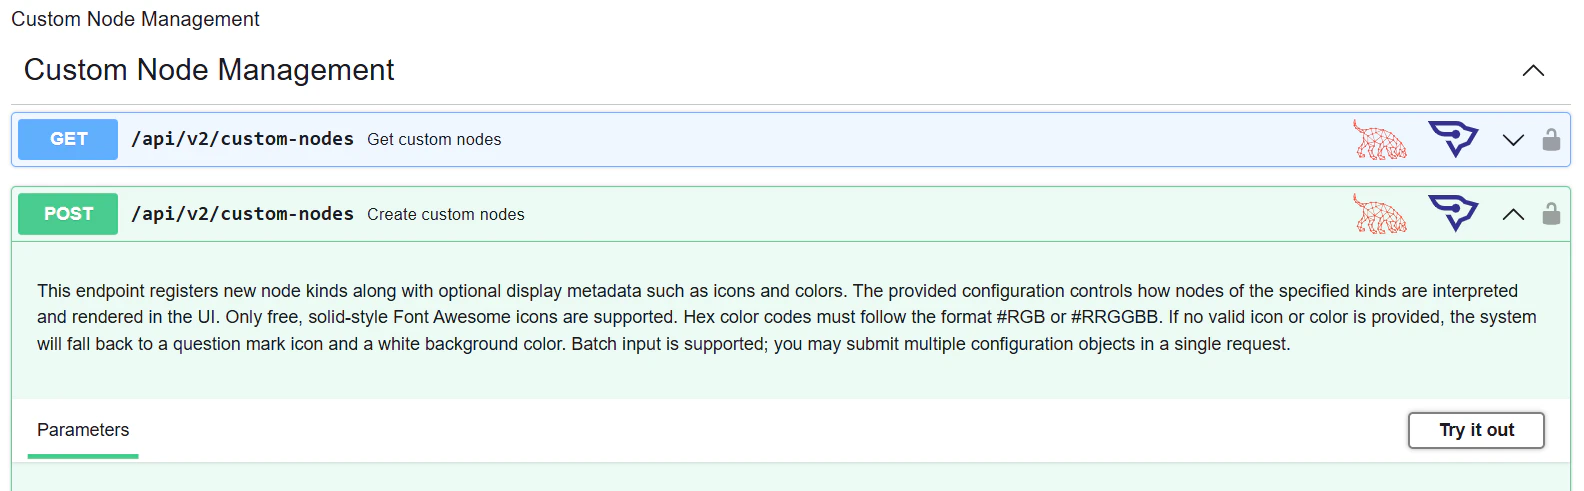
 Under **Custom Node Management**, expand the `POST /api/v2/custom-nodes` endpoint and click **Try it out**.
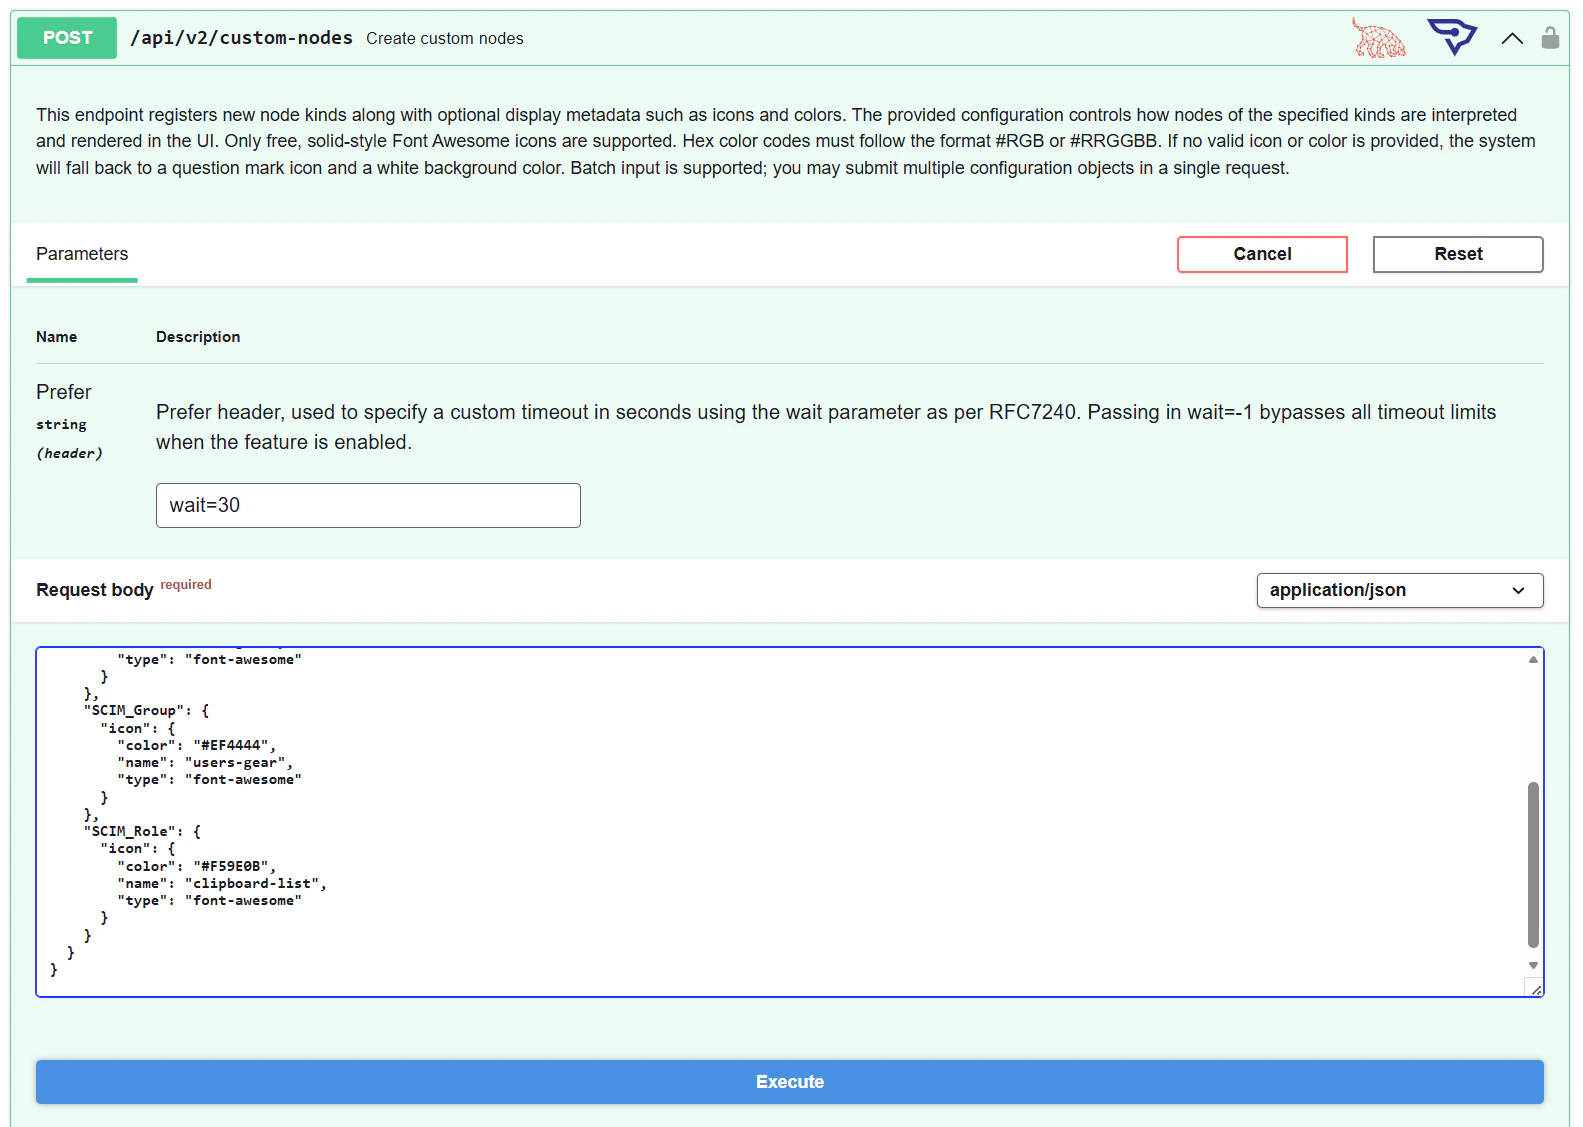
 Enter your custom icon configuration in the **Request body** field and click **Execute**.
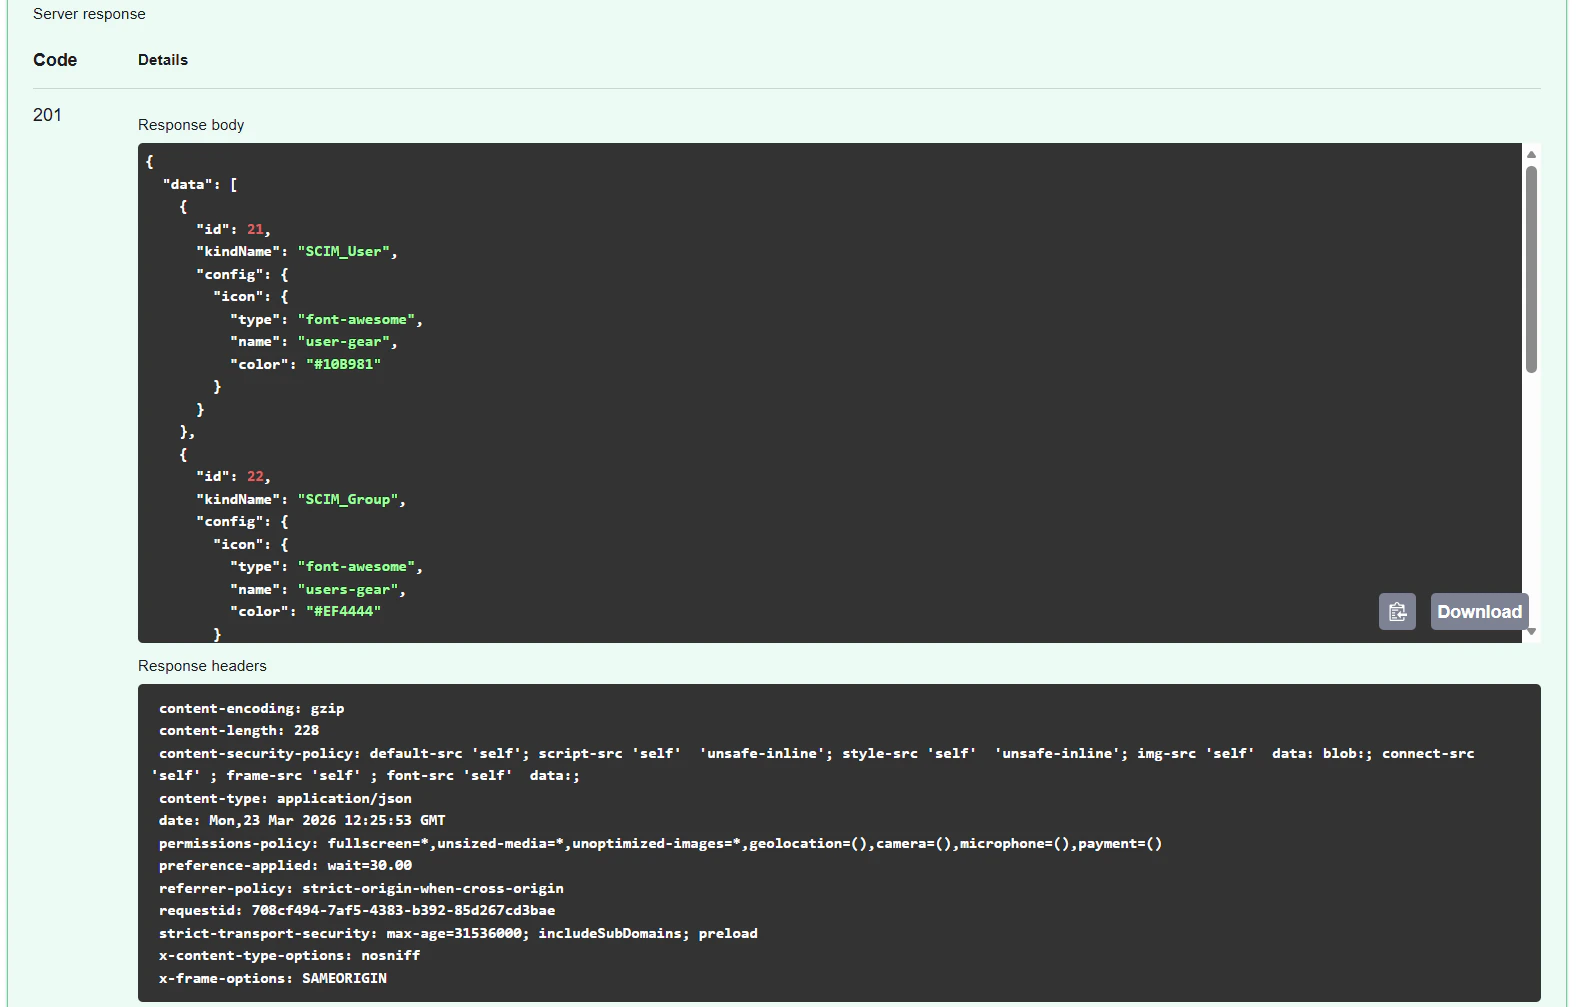
 A `201` response confirms your custom icons were created successfully.
 ### Python script
Use the following Python script to define custom icons via the API. You will need to generate a [Bearer Token](/reference/overview#jwt-bearer-token).
Update the `url` variable and replace the placeholder token before running the script.
```python theme={null}
import requests
import json
import urllib3
urllib3.disable_warnings(urllib3.exceptions.InsecureRequestWarning)
url = "http://127.0.0.1:8080/api/v2/custom-nodes"
headers = {
"Authorization": "Bearer eyscduDoG7TmxU",
"Content-Type": "application/json"
}
def define_icon(icon_type, icon_name, icon_color):
payload = {
"custom_types": {
icon_type: {
"icon": {
"type": "font-awesome",
"name": icon_name,
"color": icon_color
}
}
}
}
response = requests.post(
url,
headers=headers,
json=payload,
verify=False # Disables SSL verification
)
print(f"Sent icon for: {icon_type}")
print("Status Code:", response.status_code)
print("Response Body:", response.text)
print("---")
# Call function for each icon type you want to send
define_icon("Node1", "burst", "#03CEFC")
define_icon("Node2", "home", "#D67500")
```
Call `define_icon` as many times as needed for each of your node types.
### Python script
Use the following Python script to define custom icons via the API. You will need to generate a [Bearer Token](/reference/overview#jwt-bearer-token).
Update the `url` variable and replace the placeholder token before running the script.
```python theme={null}
import requests
import json
import urllib3
urllib3.disable_warnings(urllib3.exceptions.InsecureRequestWarning)
url = "http://127.0.0.1:8080/api/v2/custom-nodes"
headers = {
"Authorization": "Bearer eyscduDoG7TmxU",
"Content-Type": "application/json"
}
def define_icon(icon_type, icon_name, icon_color):
payload = {
"custom_types": {
icon_type: {
"icon": {
"type": "font-awesome",
"name": icon_name,
"color": icon_color
}
}
}
}
response = requests.post(
url,
headers=headers,
json=payload,
verify=False # Disables SSL verification
)
print(f"Sent icon for: {icon_type}")
print("Status Code:", response.status_code)
print("Response Body:", response.text)
print("---")
# Call function for each icon type you want to send
define_icon("Node1", "burst", "#03CEFC")
define_icon("Node2", "home", "#D67500")
```
Call `define_icon` as many times as needed for each of your node types.