> ## Documentation Index
> Fetch the complete documentation index at: https://bloodhound.specterops.io/llms.txt
> Use this file to discover all available pages before exploring further.
# Integrate BloodHound Enterprise with Splunk SOAR
> Learn how to install and configure the BloodHound Enterprise Splunk SOAR app to ingest attack path findings into Splunk SOAR.
 Splunk SOAR (formerly Phantom) helps security teams orchestrate tools and automate response workflows. This guide focuses on installing and configuring the BloodHound Enterprise app in Splunk SOAR.
For platform concepts, terminology, and product capabilities, see the [Splunk SOAR documentation](https://help.splunk.com/en/splunk-soar).
The [BloodHound Enterprise for Splunk SOAR app](https://splunkbase.splunk.com/app/7772) allows you to view attack path findings from BloodHound Enterprise within the Splunk SOAR platform. This integration enables security teams to monitor and respond to potential attack paths in real-time using Splunk SOAR's automation capabilities.
Integrating BloodHound with Splunk SOAR provides the following advantages:
* **Get real-time visibility into attack path findings**: View BloodHound Enterprise findings in Splunk SOAR as they are detected.
* **Automate response playbooks from BloodHound detections**: Trigger investigation and containment workflows automatically when BloodHound Enterprise identifies a risk.
* **Reduce manual triage and improve consistency**: Standardize repeatable response actions across your existing security tooling.
* **Accelerate mitigation of privilege escalation risks**: Use automated tasks to respond to high-impact identity threats faster.
## Prerequisites
Before you begin the installation and configuration process, ensure the following prerequisites are met:
* Admin access to a Splunk SOAR instance
* Access to a BloodHound Enterprise tenant
* BloodHound Enterprise [non-personal API key/ID pair](/integrations/bloodhound-api/working-with-api#create-a-non-personal-api-key%2Fid-pair) with the **Auditor** role
## Install the app
Installing the BloodHound Enterprise for Splunk SOAR app involves the following steps:
1. Log in to your Splunk SOAR instance as an admin.
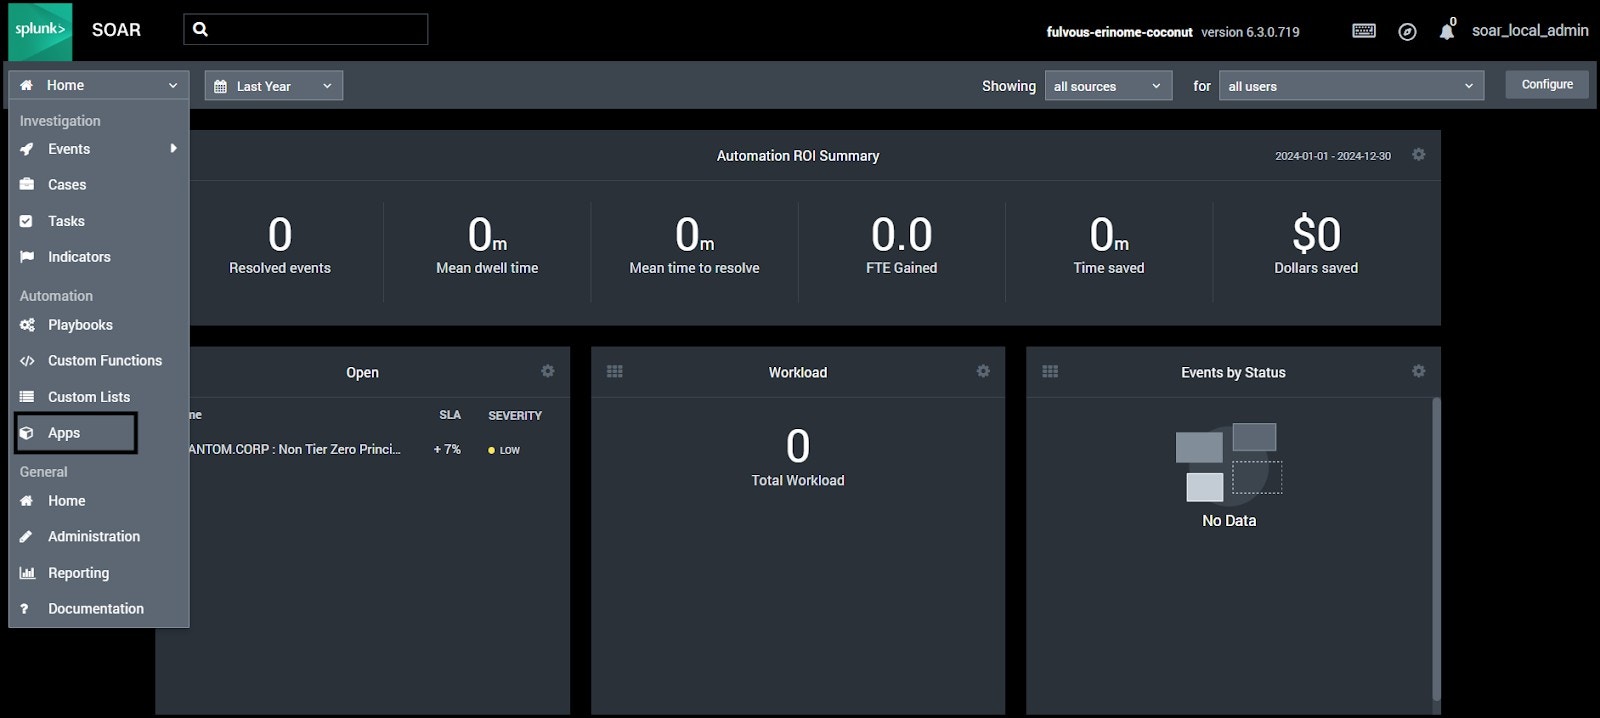
2. Click on the **Home** dropdown in the top-left corner and select **Apps**.
Splunk SOAR (formerly Phantom) helps security teams orchestrate tools and automate response workflows. This guide focuses on installing and configuring the BloodHound Enterprise app in Splunk SOAR.
For platform concepts, terminology, and product capabilities, see the [Splunk SOAR documentation](https://help.splunk.com/en/splunk-soar).
The [BloodHound Enterprise for Splunk SOAR app](https://splunkbase.splunk.com/app/7772) allows you to view attack path findings from BloodHound Enterprise within the Splunk SOAR platform. This integration enables security teams to monitor and respond to potential attack paths in real-time using Splunk SOAR's automation capabilities.
Integrating BloodHound with Splunk SOAR provides the following advantages:
* **Get real-time visibility into attack path findings**: View BloodHound Enterprise findings in Splunk SOAR as they are detected.
* **Automate response playbooks from BloodHound detections**: Trigger investigation and containment workflows automatically when BloodHound Enterprise identifies a risk.
* **Reduce manual triage and improve consistency**: Standardize repeatable response actions across your existing security tooling.
* **Accelerate mitigation of privilege escalation risks**: Use automated tasks to respond to high-impact identity threats faster.
## Prerequisites
Before you begin the installation and configuration process, ensure the following prerequisites are met:
* Admin access to a Splunk SOAR instance
* Access to a BloodHound Enterprise tenant
* BloodHound Enterprise [non-personal API key/ID pair](/integrations/bloodhound-api/working-with-api#create-a-non-personal-api-key%2Fid-pair) with the **Auditor** role
## Install the app
Installing the BloodHound Enterprise for Splunk SOAR app involves the following steps:
1. Log in to your Splunk SOAR instance as an admin.
2. Click on the **Home** dropdown in the top-left corner and select **Apps**.
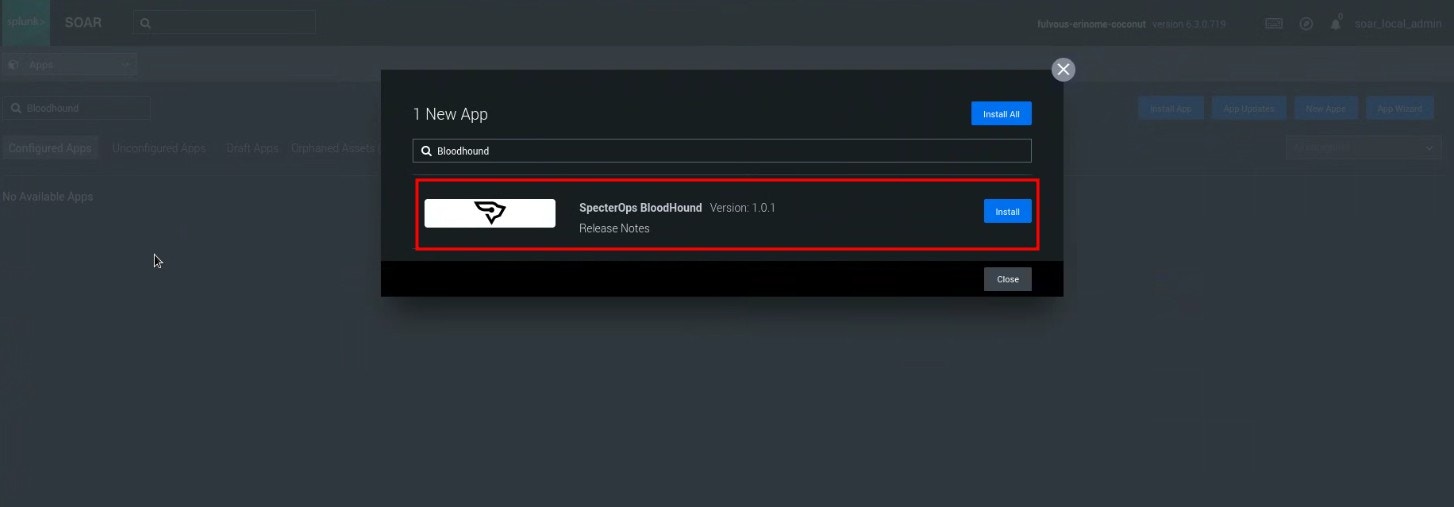
 1. Enter *BloodHound* in the app search box.
 2. Click **Install**.
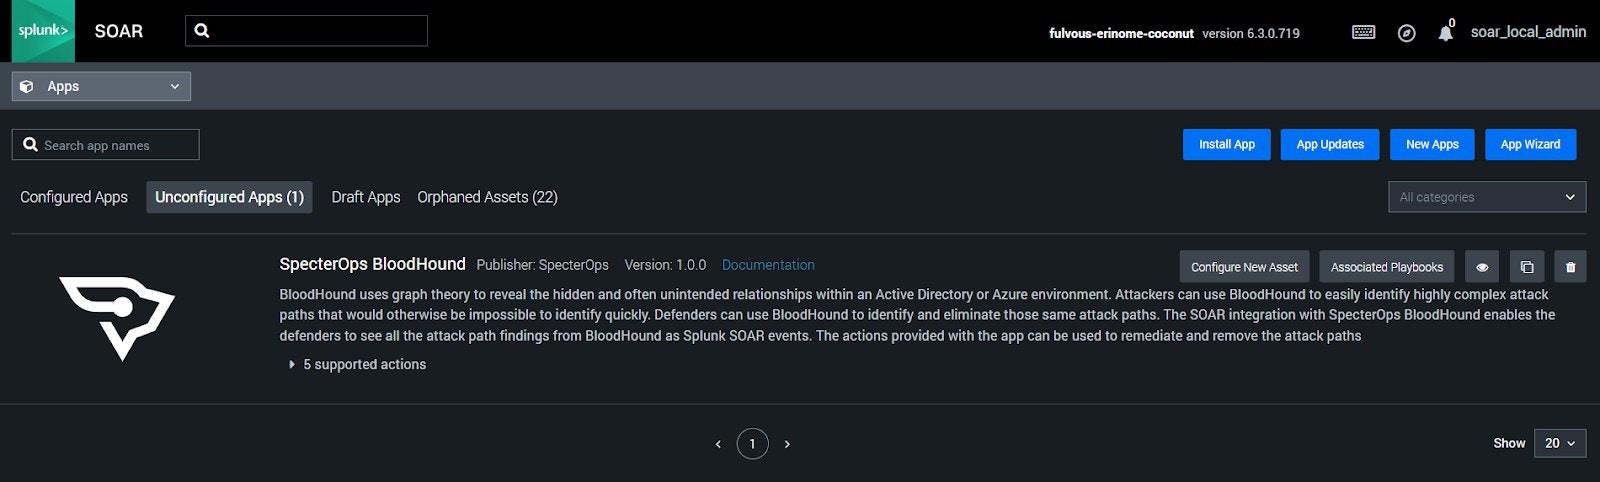
 After installing the app, you can see it in the **Unconfigured Apps** section.
 ## Configure the app
After installing the BloodHound Enterprise for Splunk SOAR app, you need to configure it to connect to your BloodHound Enterprise tenant and start ingesting attack path findings. The configuration process involves the following steps:
On the **Unconfigured Apps** page, click **Configure New Asset** for the BloodHound Enterprise app.
## Configure the app
After installing the BloodHound Enterprise for Splunk SOAR app, you need to configure it to connect to your BloodHound Enterprise tenant and start ingesting attack path findings. The configuration process involves the following steps:
On the **Unconfigured Apps** page, click **Configure New Asset** for the BloodHound Enterprise app.
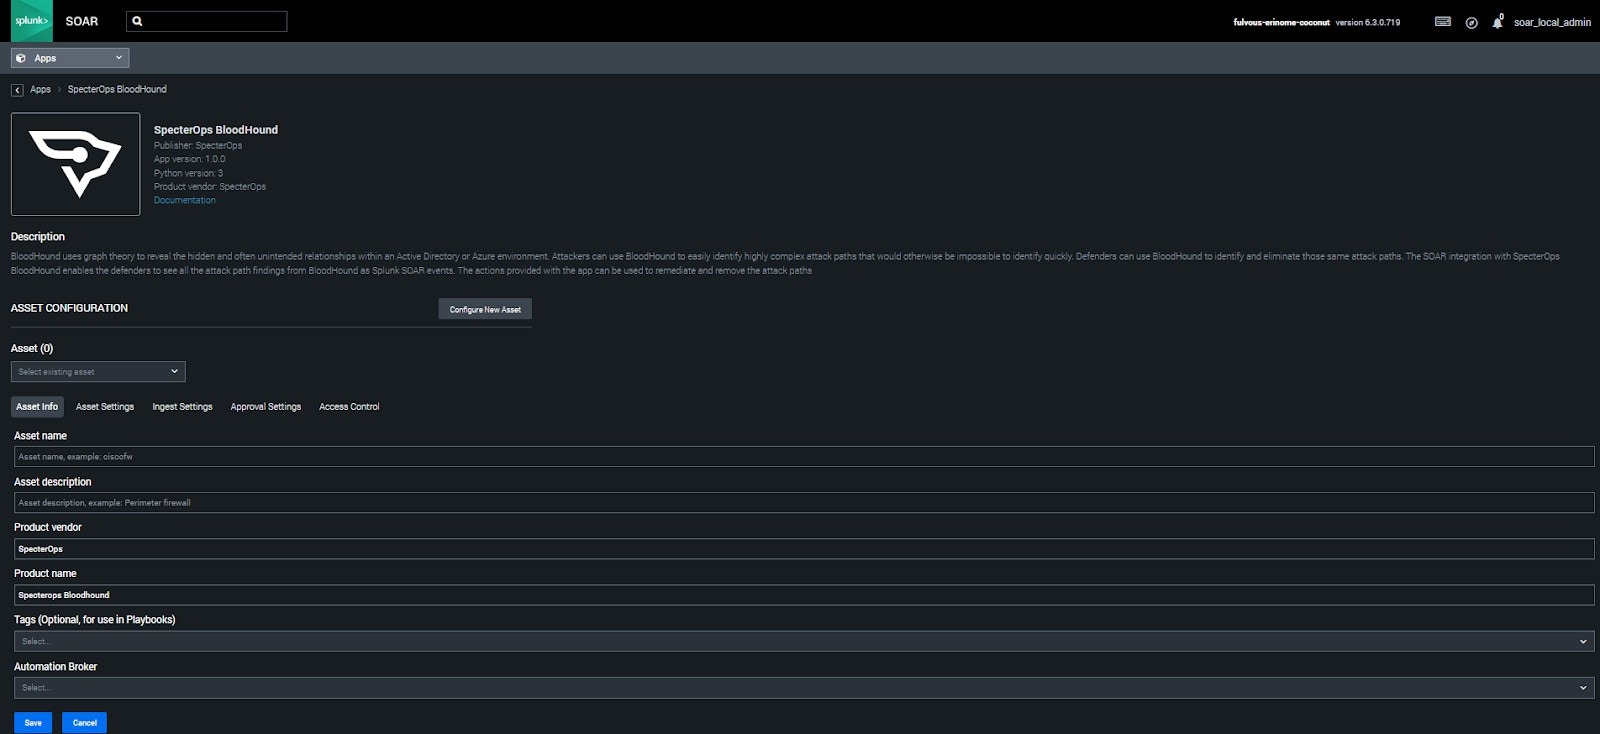 1. Enter the **Asset name** and the **Asset description**.
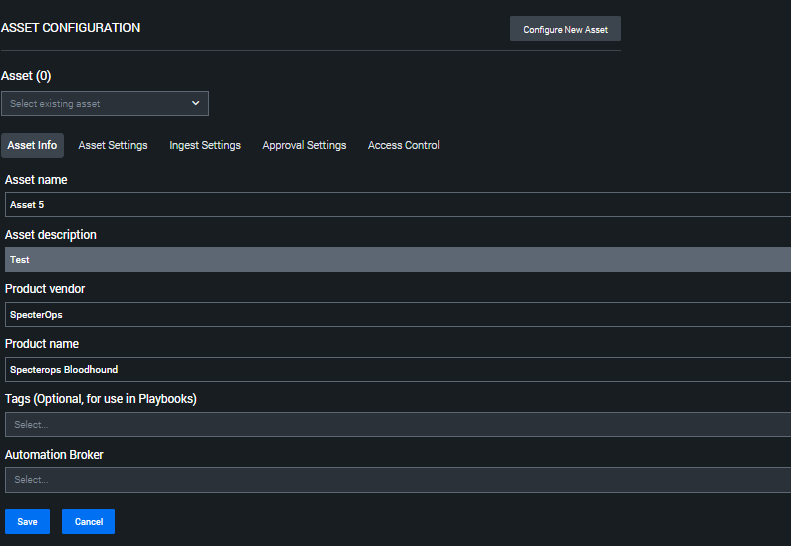 2. Click **Save**.
1. Click **Asset Settings** to set up the connection to BloodHound Enterprise.
2. Enter the following details:
| Field | Description |
| -------------------------------- | -------------------------------------------------------------------------- |
| **BloodHound Enterprise Domain** | The URL you use to access your BloodHound Enterprise tenant |
| **Token Key** | The token key from your BloodHound Enterprise non-personal API key/ID pair |
| **Token ID** | The token ID from your BloodHound Enterprise non-personal API key/ID pair |
2. Click **Save**.
1. Click **Asset Settings** to set up the connection to BloodHound Enterprise.
2. Enter the following details:
| Field | Description |
| -------------------------------- | -------------------------------------------------------------------------- |
| **BloodHound Enterprise Domain** | The URL you use to access your BloodHound Enterprise tenant |
| **Token Key** | The token key from your BloodHound Enterprise non-personal API key/ID pair |
| **Token ID** | The token ID from your BloodHound Enterprise non-personal API key/ID pair |
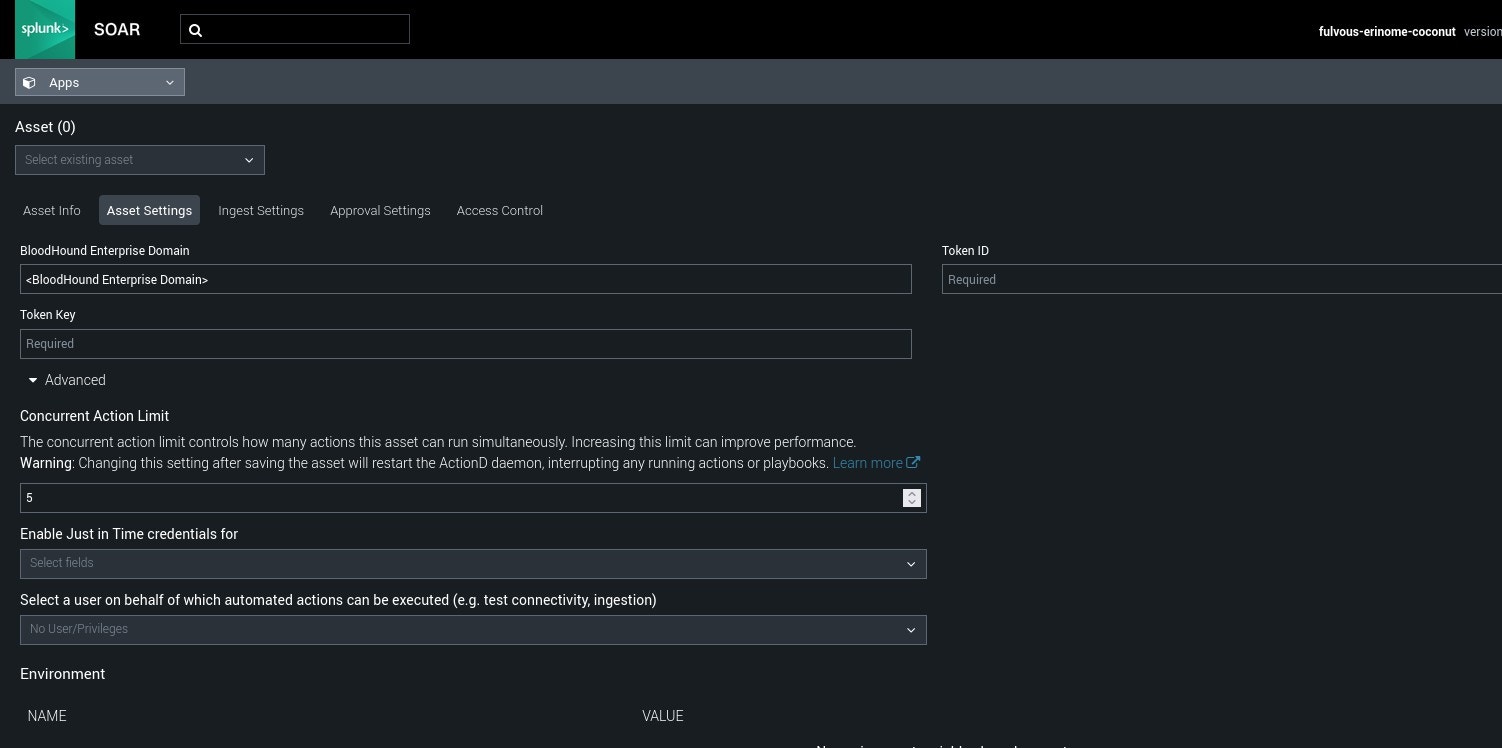 3. Click **Save**.
1. Click **Ingest Settings** to set up how the app ingests data from BloodHound Enterprise.
2. Configure the following settings:
| Field | Description |
| ---------------------------------------------------------------------------- | ---------------------------------------------------------------------------------------------------------------------------------------- |
| **Label to apply to objects from this source** | Select **events** to label ingested data as events in Splunk SOAR |
| **Select a polling interval or schedule to configure polling on this asset** | Choose how often the app should poll BloodHound Enterprise for new findings. For testing, you can select **Off** and use manual polling. |
3. Click **Save**.
1. Click **Ingest Settings** to set up how the app ingests data from BloodHound Enterprise.
2. Configure the following settings:
| Field | Description |
| ---------------------------------------------------------------------------- | ---------------------------------------------------------------------------------------------------------------------------------------- |
| **Label to apply to objects from this source** | Select **events** to label ingested data as events in Splunk SOAR |
| **Select a polling interval or schedule to configure polling on this asset** | Choose how often the app should poll BloodHound Enterprise for new findings. For testing, you can select **Off** and use manual polling. |
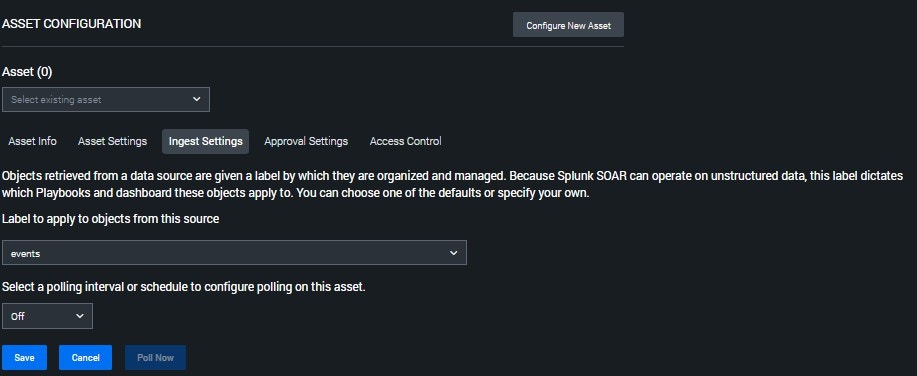 3. Click **Save**.
Go back to **Asset Settings** and click **Test Connectivity** to verify the configuration.
3. Click **Save**.
Go back to **Asset Settings** and click **Test Connectivity** to verify the configuration.
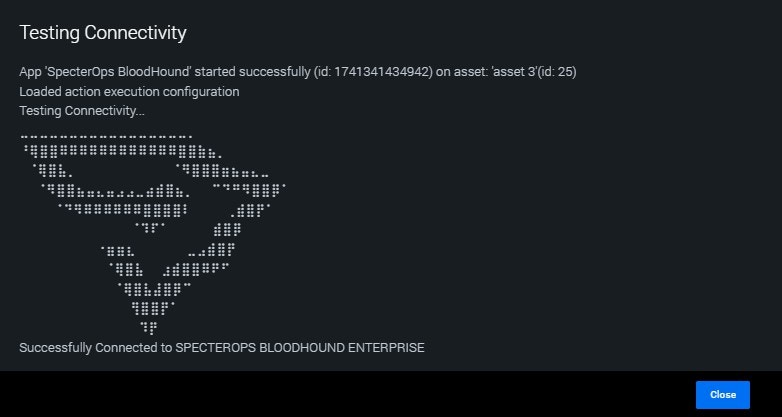
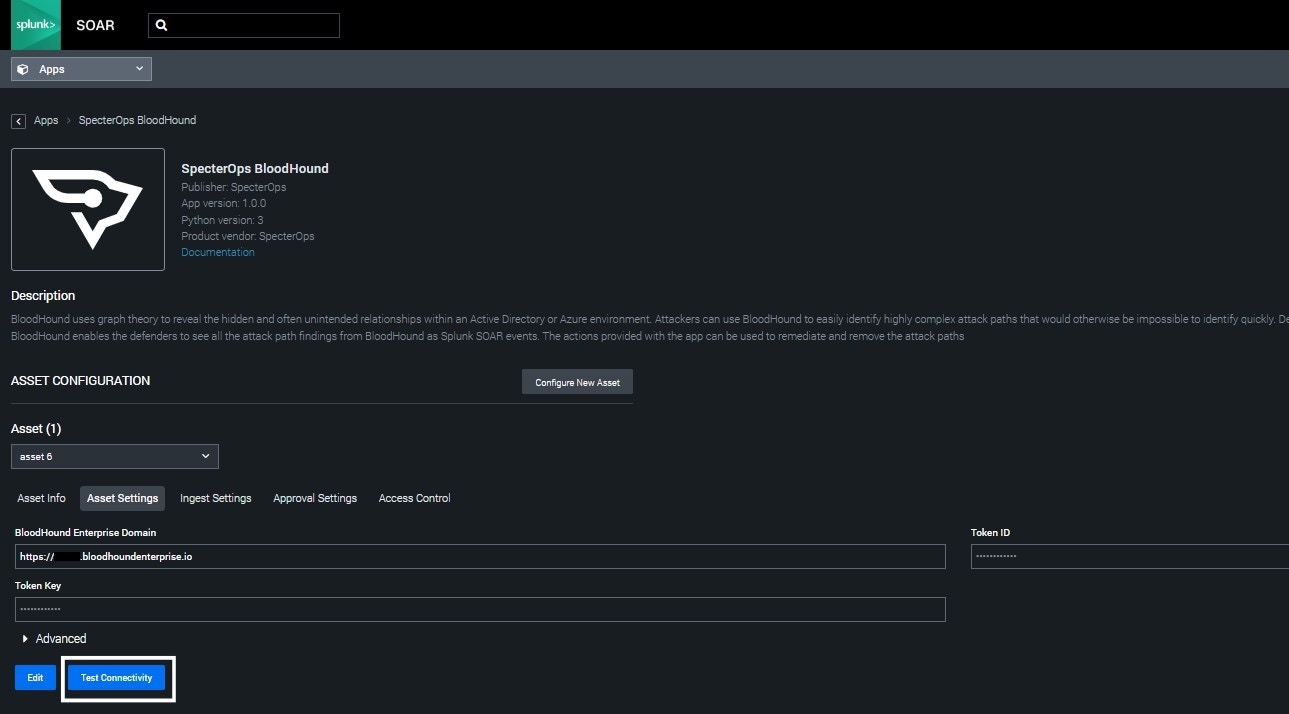 If the configuration is correct, Splunk SOAR confirms that the app is connected successfully, as shown in the following image.
 If you set the polling interval to **Off** for testing, you can manually poll for events to start ingesting data from BloodHound Enterprise.
1. Click **Ingest Settings**.
2. Enter the following values:
| Field | Description |
| ---------------------- | ------------------------------------------------------------------------------------ |
| **Maximum containers** | The maximum number of containers (event groupings) to ingest per polling cycle. |
| **Maximum artifacts** | The maximum number of artifacts (individual data items) to ingest per polling cycle. |
See the [Splunk SOAR documentation](https://help.splunk.com/en/splunk-soar) for more information about these settings.
3. Click **Poll Now**.
If you set the polling interval to **Off** for testing, you can manually poll for events to start ingesting data from BloodHound Enterprise.
1. Click **Ingest Settings**.
2. Enter the following values:
| Field | Description |
| ---------------------- | ------------------------------------------------------------------------------------ |
| **Maximum containers** | The maximum number of containers (event groupings) to ingest per polling cycle. |
| **Maximum artifacts** | The maximum number of artifacts (individual data items) to ingest per polling cycle. |
See the [Splunk SOAR documentation](https://help.splunk.com/en/splunk-soar) for more information about these settings.
3. Click **Poll Now**.
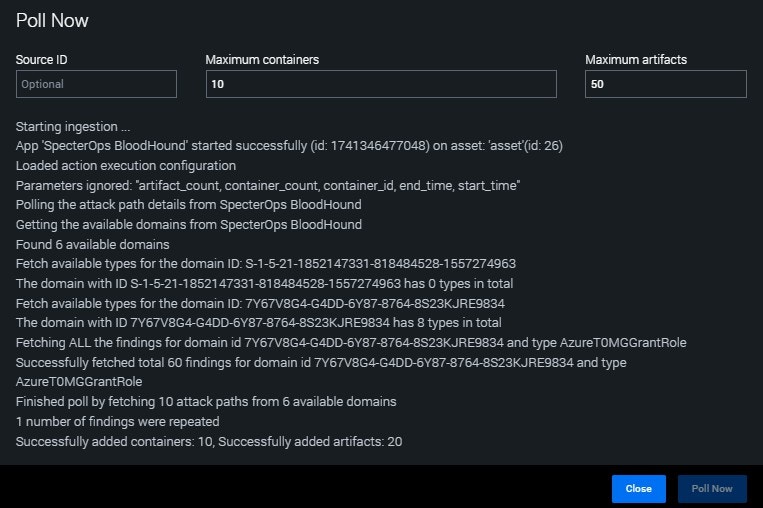
 After polling completes, confirm that containers and artifacts were added successfully, as shown below.
 4. Click **Close**.
## Next steps
The configuration is now complete. You can [view attack path findings](/integrations/splunk/soar/use) from BloodHound Enterprise in Splunk SOAR and use them to trigger automated response playbooks.
4. Click **Close**.
## Next steps
The configuration is now complete. You can [view attack path findings](/integrations/splunk/soar/use) from BloodHound Enterprise in Splunk SOAR and use them to trigger automated response playbooks.