> ## Documentation Index
> Fetch the complete documentation index at: https://bloodhound.specterops.io/llms.txt
> Use this file to discover all available pages before exploring further.
# Run Multiple AzureHound Enterprise Collectors on One Server With Scheduled Tasks
 ## Purpose
This article outlines how to set up multiple AzureHound Enterprise collectors on the same server using scheduled tasks. Authorized Active Directory administrators should use this when experiencing issues while running multiple AzureHound collectors simultaneously on the same server.
## Process
### A. Create the AzureHound files for all Azure tenants
1. Follow the [AzureHound Enterprise System Requirements and Deployment Process](/install-data-collector/install-azurehound/system-requirements) through deployment in step 3. Deploy and maintain AzureHound: [Run and Upgrade AzureHound (Windows, Docker, or Kubernetes).](/install-data-collector/install-azurehound/installation-options)
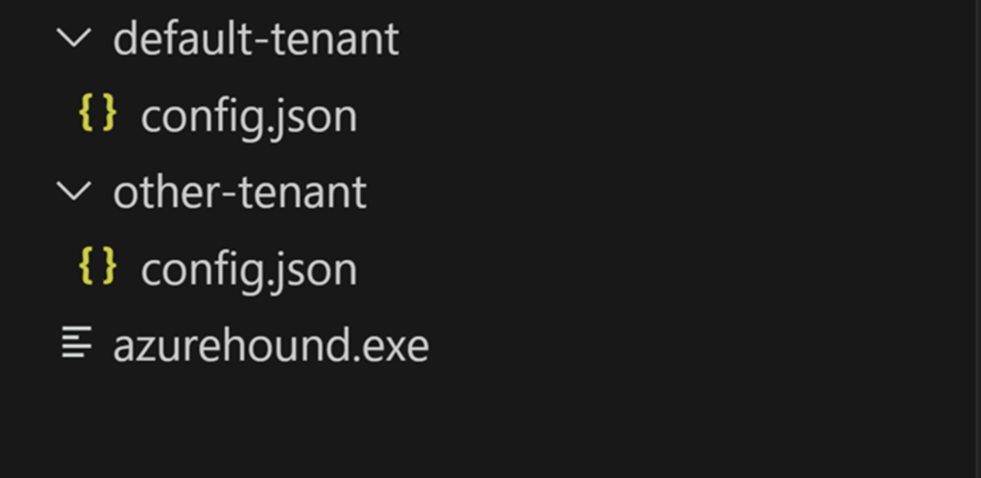
2. Organize the files created in a directory structure with a single AzureHound binary and a directory at the same level for each desired tenant configuration.
## Purpose
This article outlines how to set up multiple AzureHound Enterprise collectors on the same server using scheduled tasks. Authorized Active Directory administrators should use this when experiencing issues while running multiple AzureHound collectors simultaneously on the same server.
## Process
### A. Create the AzureHound files for all Azure tenants
1. Follow the [AzureHound Enterprise System Requirements and Deployment Process](/install-data-collector/install-azurehound/system-requirements) through deployment in step 3. Deploy and maintain AzureHound: [Run and Upgrade AzureHound (Windows, Docker, or Kubernetes).](/install-data-collector/install-azurehound/installation-options)
2. Organize the files created in a directory structure with a single AzureHound binary and a directory at the same level for each desired tenant configuration.
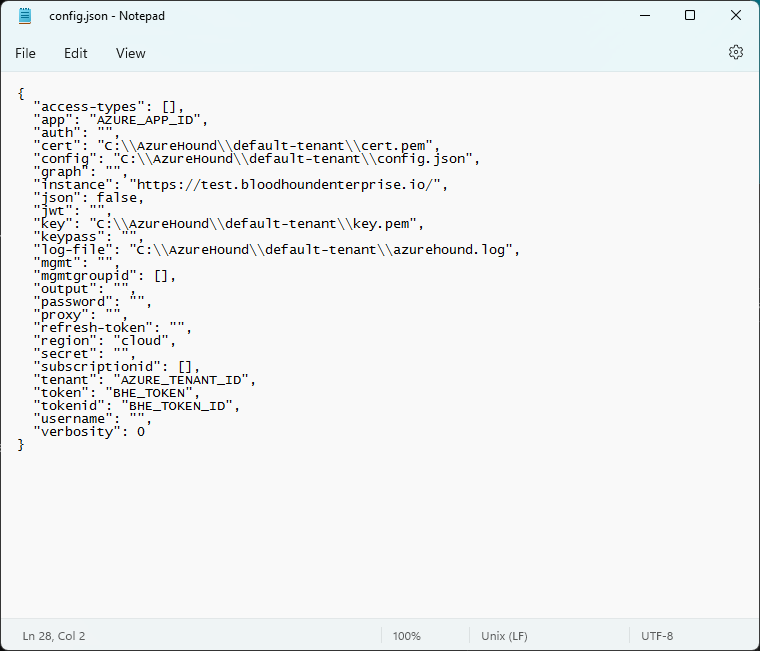
 3. Update associated paths in each **config.json** file to reflect the new file locations. The example below shows the **default-tenant** directory pictured in step 2.
 ### B. Setup the Scheduled Task
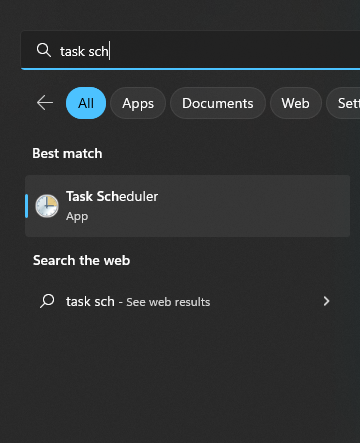
1. Log in to an Administrator account on a computer with access to the desired collection server. Then, from the **Windows S\*\*\*\*tart** menu, open the **Task Scheduler** application.
### B. Setup the Scheduled Task
1. Log in to an Administrator account on a computer with access to the desired collection server. Then, from the **Windows S\*\*\*\*tart** menu, open the **Task Scheduler** application.
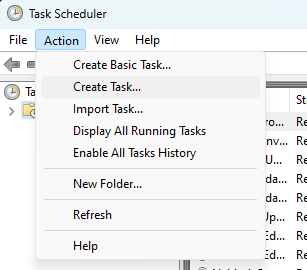
 2. From the **Action** menu, select **Create task…** This will open a window to name and configure a new task.
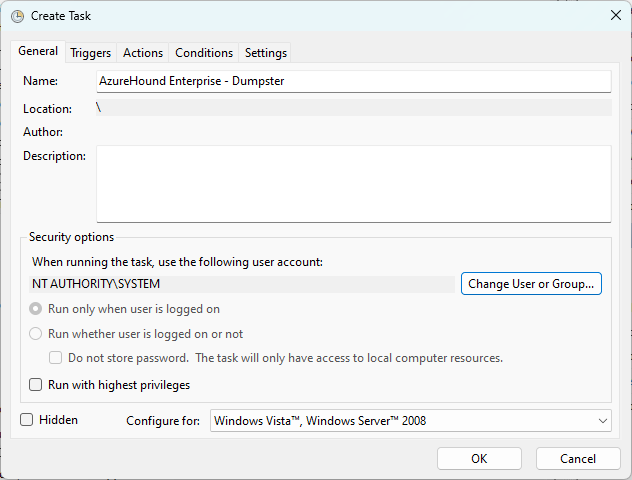
 3. Best practices recommend naming tasks after their collector service and tenant to ensure clarity when reviewing multiple tasks across multiple collectors and/or tenants. In this example, **AzureHound Enterprise** is the collector, and the tenant referenced is **Dumpster**.
In the Security options in the lower portion of the **General** tab, select the **Change User or Group...** button to run this task as **SYSTEM**. This ensures the scheduled task remains independent from user activity.
3. Best practices recommend naming tasks after their collector service and tenant to ensure clarity when reviewing multiple tasks across multiple collectors and/or tenants. In this example, **AzureHound Enterprise** is the collector, and the tenant referenced is **Dumpster**.
In the Security options in the lower portion of the **General** tab, select the **Change User or Group...** button to run this task as **SYSTEM**. This ensures the scheduled task remains independent from user activity.
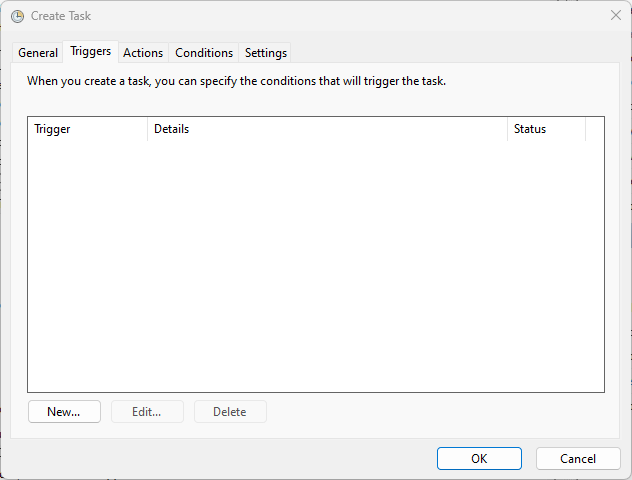
 4. On the **Trigger** tab, click **New**.
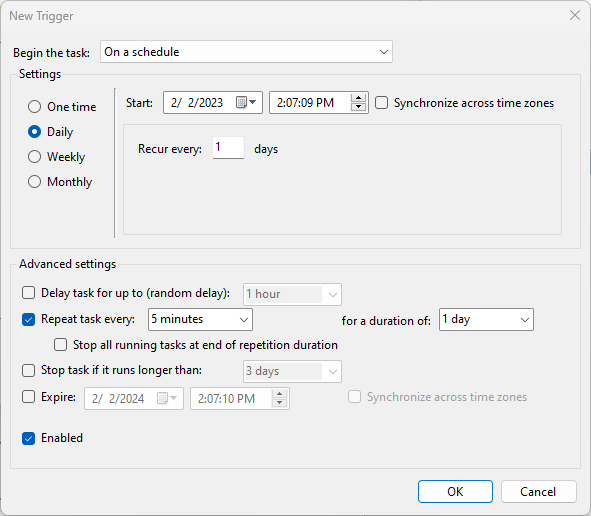
 5. On the **New Trigger** screen, set the task to run **Daily**, **repeating every 5 minutes** for a **duration of 1 day**. This ensures the task restarts if an issue arises.
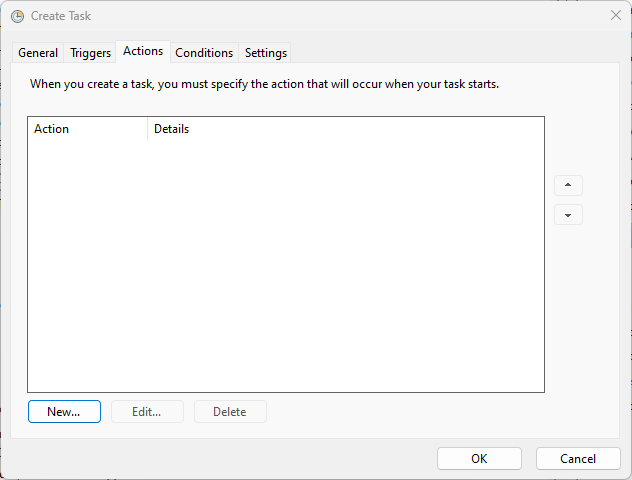
 5. On the **Action** tab, **New**.
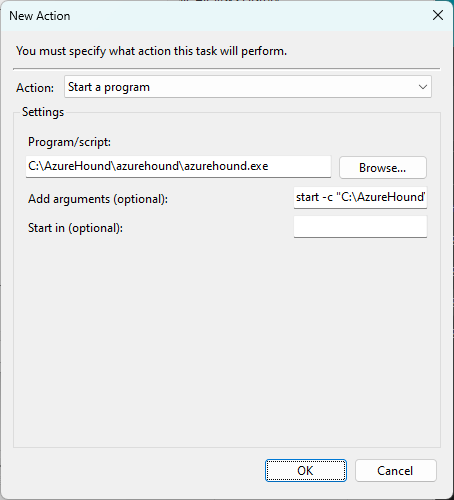
 6. On the **New Action** window, select **Start a program**, then **Browse...** to the location of AzureHound with the config file for that Azure tenant. Modify the following argument to match the location of the appropriate **config.json**, then fill in the **Add arguments (optional)** field, and click **OK**.
```
start -c "C:\\AzureHound\\dumpster-tenant\\config.json"
```
6. On the **New Action** window, select **Start a program**, then **Browse...** to the location of AzureHound with the config file for that Azure tenant. Modify the following argument to match the location of the appropriate **config.json**, then fill in the **Add arguments (optional)** field, and click **OK**.
```
start -c "C:\\AzureHound\\dumpster-tenant\\config.json"
```
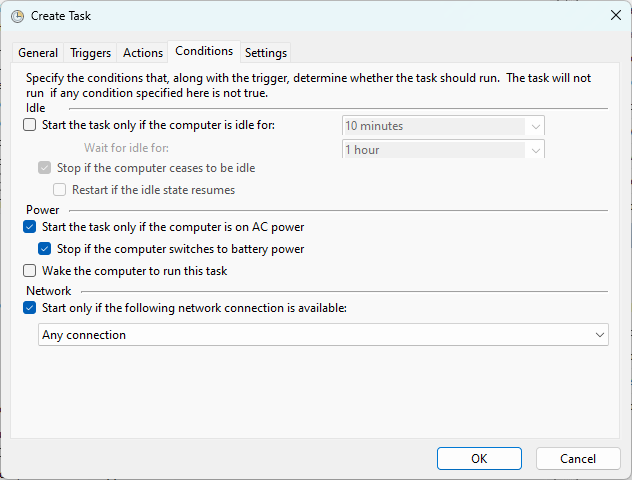
 6. On the bottom of the **Conditions** tab, check the **Start only if the following network connection is** **available:** checkbox, and select **Any connection**.
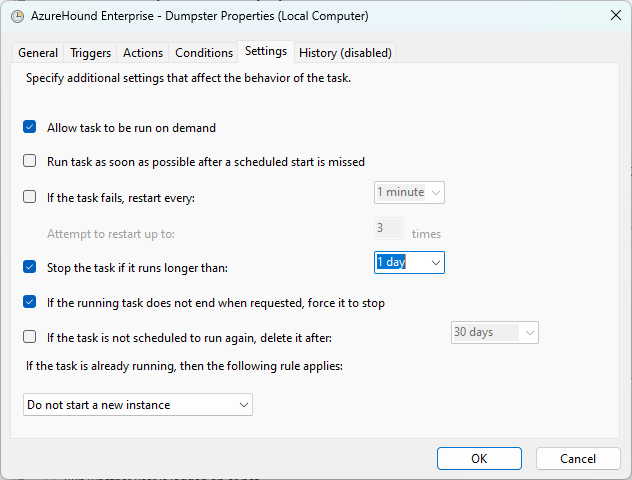
 7. On the **Settings** tab, enable the **Stop the task if it runs longer than 1 day** setting, then select **OK**.
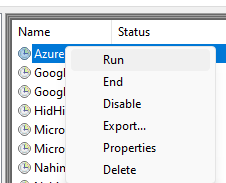
 8. Right-click on the new **AzureHound** task in the **Task Scheduler** window, and choose **Run**.
 9. Navigate to your BloodHound Enterprise tenant, click on the **Gear icon**, then **Administration,** and scroll down in the **Manage Clients** view to confirm AzureHound is executing collections appropriately. If the task is set up correctly, there will be a green dot next to **Ready**.
 ### C. Setup remaining Scheduled Tasks
Repeat **Section B** for any additionally required scheduled tasks for other Azure tenants.
## Outcome
When this process is executed successfully, scheduled tasks automatically direct multiple AzureHound collections to run on the same server simultaneously and in a way that is clearly distinguishable from discrete user activity.
### C. Setup remaining Scheduled Tasks
Repeat **Section B** for any additionally required scheduled tasks for other Azure tenants.
## Outcome
When this process is executed successfully, scheduled tasks automatically direct multiple AzureHound collections to run on the same server simultaneously and in a way that is clearly distinguishable from discrete user activity.
