> ## Documentation Index
> Fetch the complete documentation index at: https://bloodhound.specterops.io/llms.txt
> Use this file to discover all available pages before exploring further.
# Create a Collector Client
> Learn how to create a BloodHound Enterprise collector client.
 ## Purpose
This guide explains how to create a BloodHound Enterprise collector client. It is intended for Administrators who are deploying SharpHound Enterprise or AzureHound Enterprise for data collection.
Collector clients connect your BloodHound Enterprise tenant to your collector applications. They provide the necessary authentication and configuration information for your SharpHound Enterprise or AzureHound Enterprise collector applications to securely upload collected data to your BloodHound Enterprise instance for processing and analysis.
BloodHound Enterprise supports two types of collector clients:
* **SharpHound Enterprise** - Collects data from Active Directory environments
* **AzureHound Enterprise** - Collects data from Entra ID environments
## Prerequisites
* A BloodHound Enterprise tenant
* Logged in as a user assigned a [role](/manage-bloodhound/auth/users-and-roles) authorized to create a collector client
See [SharpHound Enterprise System Requirements](/install-data-collector/install-sharphound/system-requirements) or [AzureHound Enterprise System Requirements](/install-data-collector/install-azurehound/system-requirements) for more information on the requirements for each collector type.
## Process
This guide covers the required steps to create a collector client in your BloodHound Enterprise tenant.
Optional configuration settings are also explained, but can be skipped during initial setup and configured later if necessary.
### AzureHound Enterprise
AzureHound collector clients use API token-based authentication. When creating an AzureHound collector client, you must save the generated token information and use it to [configure](/install-data-collector/install-azurehound/create-configuration) the AzureHound collector application.
In the left menu, click **Administration** > **Manage Clients**.
1. On the right side of the page, click **Create Client**.
2. Select **Create AzureHound Client** from the dropdown menu.
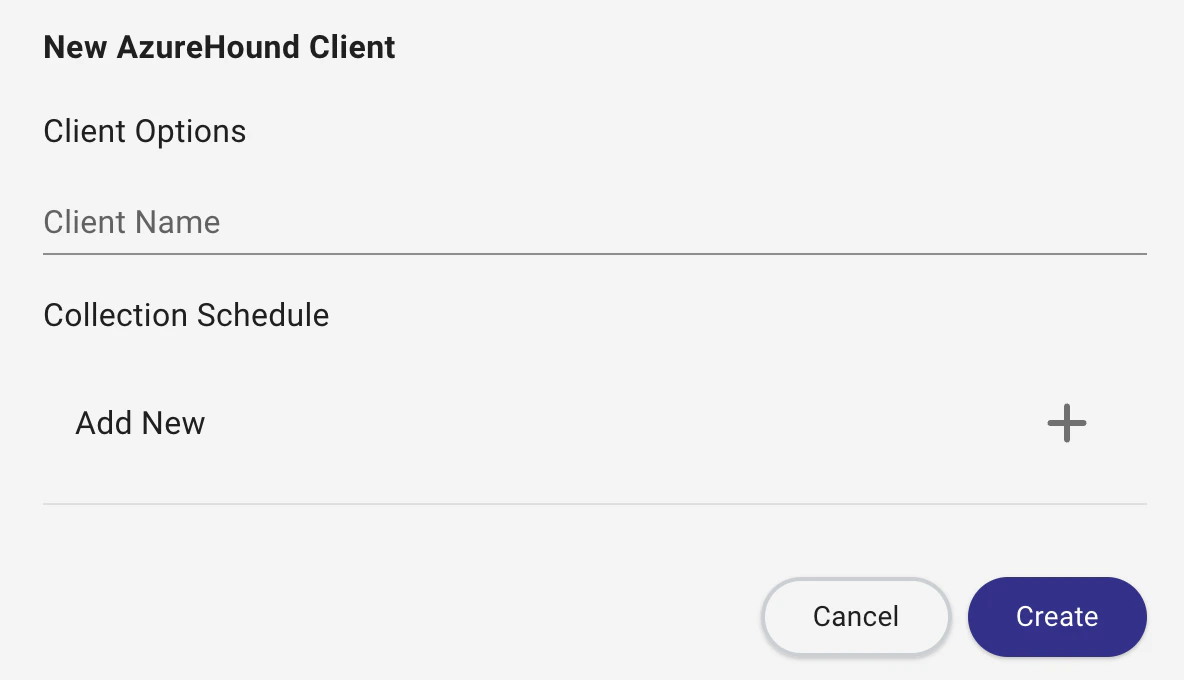
3. Complete the required fields:
| Field | Required | Description |
| ----------------------- | -------- | ----------------------------------------------------------------------------------------------------------------------------- |
| **Client Name** | Yes | A descriptive name for the collector client (e.g., the name of the domain it collects from or system it runs on) |
| **Collection Schedule** | No | Optional configuration options for [scheduling](/collect-data/enterprise-collection/collection-schedule) data collection jobs |
## Purpose
This guide explains how to create a BloodHound Enterprise collector client. It is intended for Administrators who are deploying SharpHound Enterprise or AzureHound Enterprise for data collection.
Collector clients connect your BloodHound Enterprise tenant to your collector applications. They provide the necessary authentication and configuration information for your SharpHound Enterprise or AzureHound Enterprise collector applications to securely upload collected data to your BloodHound Enterprise instance for processing and analysis.
BloodHound Enterprise supports two types of collector clients:
* **SharpHound Enterprise** - Collects data from Active Directory environments
* **AzureHound Enterprise** - Collects data from Entra ID environments
## Prerequisites
* A BloodHound Enterprise tenant
* Logged in as a user assigned a [role](/manage-bloodhound/auth/users-and-roles) authorized to create a collector client
See [SharpHound Enterprise System Requirements](/install-data-collector/install-sharphound/system-requirements) or [AzureHound Enterprise System Requirements](/install-data-collector/install-azurehound/system-requirements) for more information on the requirements for each collector type.
## Process
This guide covers the required steps to create a collector client in your BloodHound Enterprise tenant.
Optional configuration settings are also explained, but can be skipped during initial setup and configured later if necessary.
### AzureHound Enterprise
AzureHound collector clients use API token-based authentication. When creating an AzureHound collector client, you must save the generated token information and use it to [configure](/install-data-collector/install-azurehound/create-configuration) the AzureHound collector application.
In the left menu, click **Administration** > **Manage Clients**.
1. On the right side of the page, click **Create Client**.
2. Select **Create AzureHound Client** from the dropdown menu.
3. Complete the required fields:
| Field | Required | Description |
| ----------------------- | -------- | ----------------------------------------------------------------------------------------------------------------------------- |
| **Client Name** | Yes | A descriptive name for the collector client (e.g., the name of the domain it collects from or system it runs on) |
| **Collection Schedule** | No | Optional configuration options for [scheduling](/collect-data/enterprise-collection/collection-schedule) data collection jobs |
 4. Click **Create**.
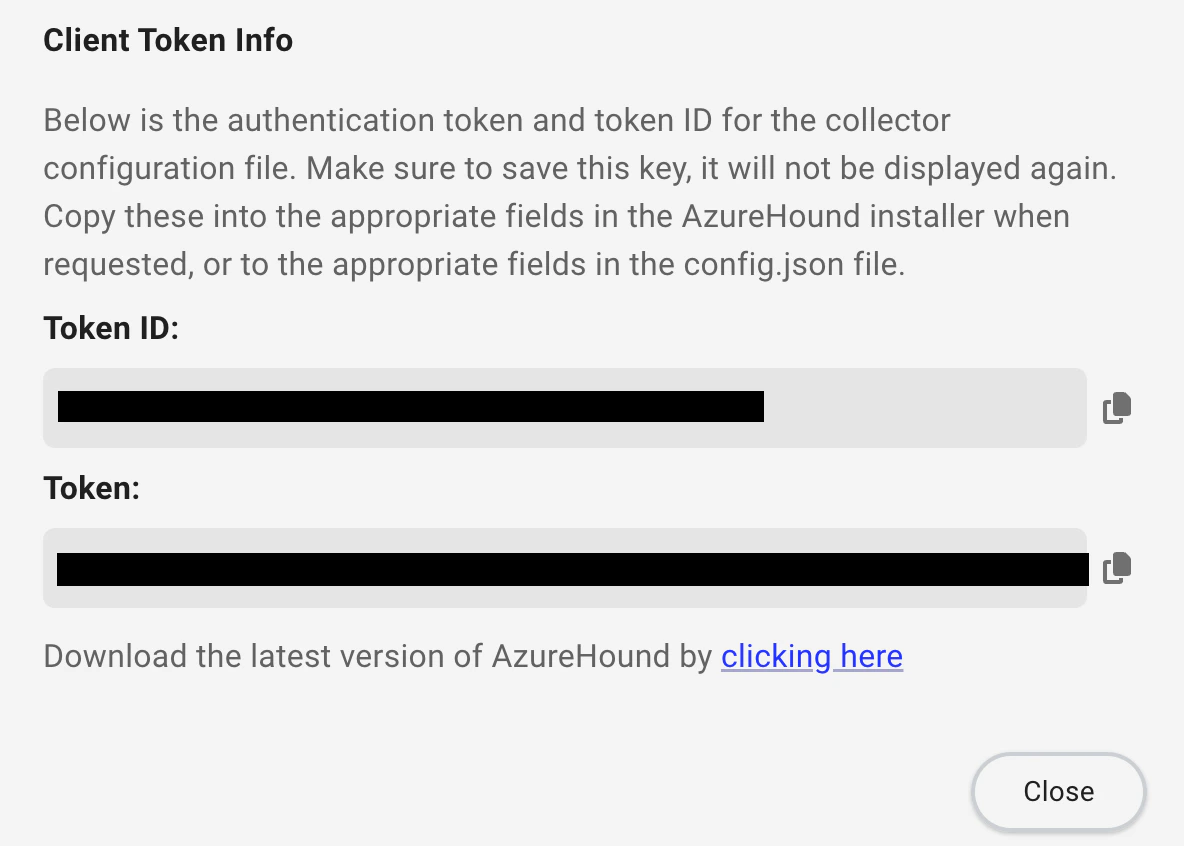
A *Client Token Info* window will appear with authentication credentials. Copy and save the token information before closing.
The token information is required to [configure](/install-data-collector/install-azurehound/create-configuration) the AzureHound collector application.
4. Click **Create**.
A *Client Token Info* window will appear with authentication credentials. Copy and save the token information before closing.
The token information is required to [configure](/install-data-collector/install-azurehound/create-configuration) the AzureHound collector application.
 ### SharpHound Enterprise
SharpHound Enterprise collector clients support both API token-based authentication and Integrated Windows Authentication (IWA) via Active Directory Federation Services (ADFS).
When creating a SharpHound Enterprise collector client, you must select the authentication method and provide the required information based on that method. Be sure to save the generated token or configuration information and use it to [configure](/install-data-collector/install-sharphound/local-configuration) the SharpHound Enterprise collector application.
In the left menu, click **Administration** > **Manage Clients**.
1. On the right side of the page, click **Create Client**.
2. Select **Create SharpHound Enterprise Client** from the dropdown menu.
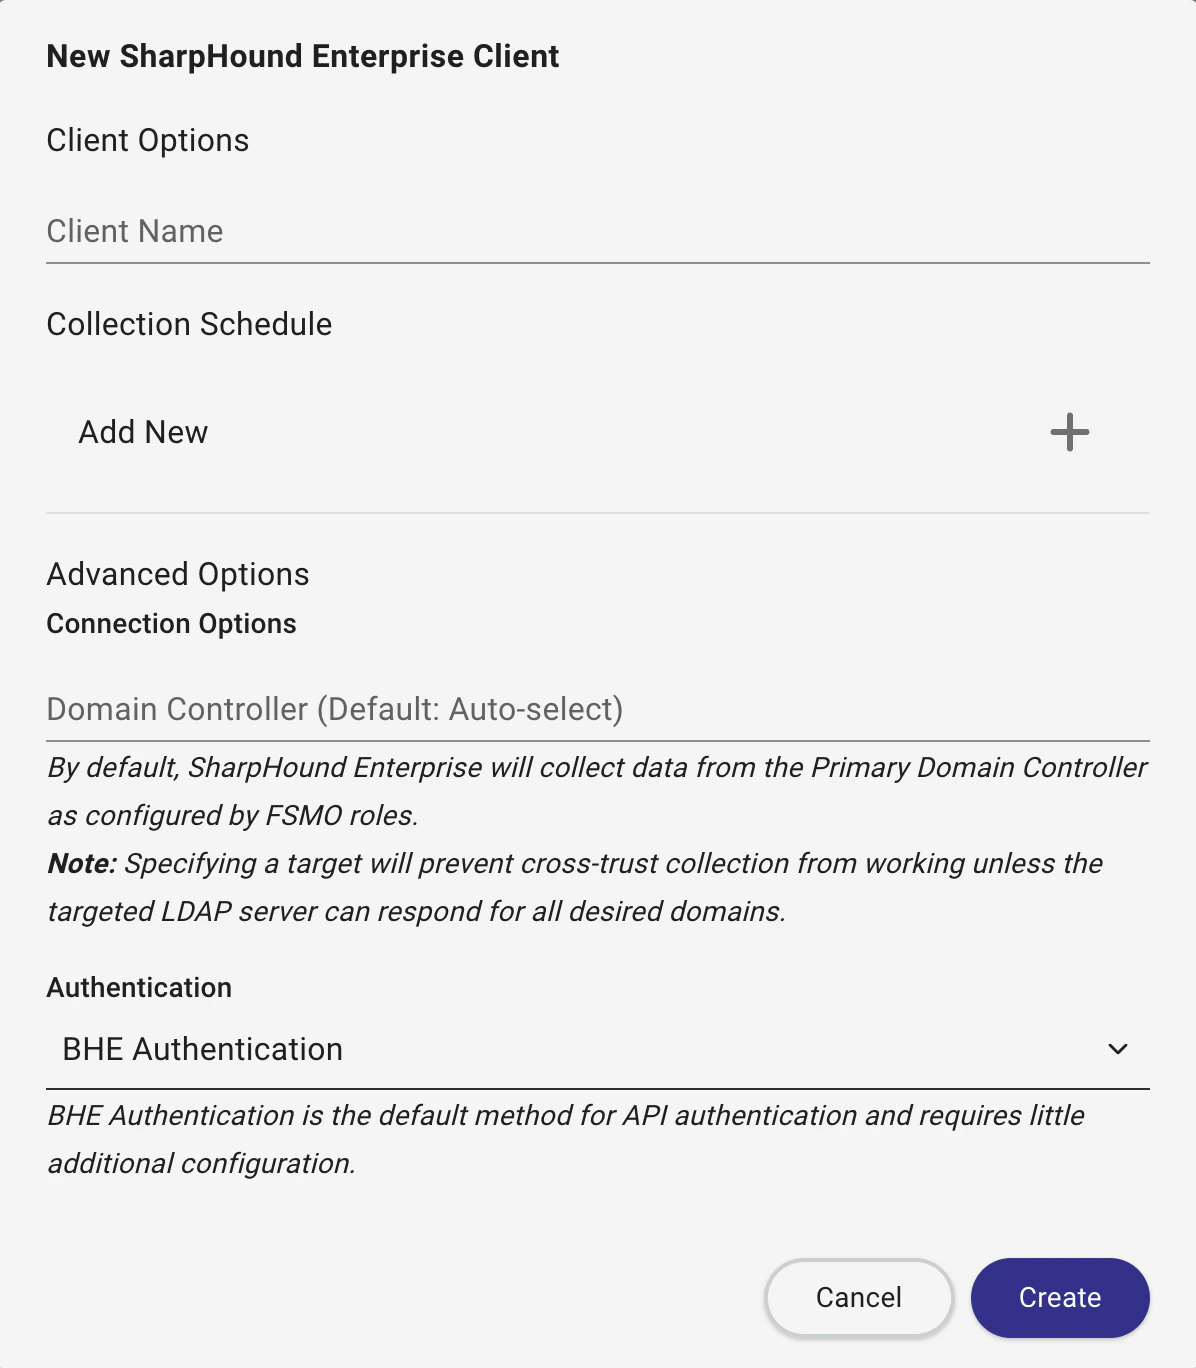
3. Complete the required fields:
| Field | Required | Description |
| --------------------------- | --------------------------- | -------------------------------------------------------------------------------------------------------------------------------------------------------------------------------------------------------------------------------------------------------------------------------------- |
| **Client Name** | Yes | A descriptive name for the collector client (e.g., the name of the domain it collects from or system it runs on) |
| **Collection Schedule** | No | Optional configuration options for [scheduling](/collect-data/enterprise-collection/collection-schedule) data collection jobs |
| **Advanced Options** | No | Optional domain controller targeting
### SharpHound Enterprise
SharpHound Enterprise collector clients support both API token-based authentication and Integrated Windows Authentication (IWA) via Active Directory Federation Services (ADFS).
When creating a SharpHound Enterprise collector client, you must select the authentication method and provide the required information based on that method. Be sure to save the generated token or configuration information and use it to [configure](/install-data-collector/install-sharphound/local-configuration) the SharpHound Enterprise collector application.
In the left menu, click **Administration** > **Manage Clients**.
1. On the right side of the page, click **Create Client**.
2. Select **Create SharpHound Enterprise Client** from the dropdown menu.
3. Complete the required fields:
| Field | Required | Description |
| --------------------------- | --------------------------- | -------------------------------------------------------------------------------------------------------------------------------------------------------------------------------------------------------------------------------------------------------------------------------------- |
| **Client Name** | Yes | A descriptive name for the collector client (e.g., the name of the domain it collects from or system it runs on) |
| **Collection Schedule** | No | Optional configuration options for [scheduling](/collect-data/enterprise-collection/collection-schedule) data collection jobs |
| **Advanced Options** | No | Optional domain controller targeting
By default, SharpHound automatically selects a Domain Controller for LDAP queries.
Specifying a target will prevent cross-trust collection from working unless the targeted LDAP server can respond for all desired domains |
| **Authentication** | Yes | Authentication method the client will use:
- **BHE Authentication**: Traditional API token-based authentication (default)
- **Integrated Windows Authentication**: Windows-based authentication via ADFS
|
| **Issuer ID** | Yes
(*IWA only*) | The ADFS well-known endpoint URL, typically: `https://adfs.example.com/.well-known/openid-configuration` |
| **Issuer Address Override** | No
(*IWA only*) | An optional override for the token issuer address if your ADFS configuration uses a different issuer URL for token validation |
The following screenshot shows the client creation form when **BHE Authentication** is selected.
 The following screenshot shows the client creation form when **Integrated Windows Authentication** is selected. Note the additional required **Issuer ID** field and optional **Issuer Address Override**.
 4. Click **Create**.
A pop-up window will appear and display the client token (for BHE Authentication) or client ID information (for Integrated Windows Authentication). Follow the instructions in it before clicking **Close**.
**Switching Authentication Methods**
If you are switching an existing SharpHound Enterprise collector client to a different authentication method, this step replaces the current credentials.
* Switching to **Integrated Windows Authentication** invalidates existing API tokens and requires you to update the `settings.json` file and remove the `auth.json` file.
* Switching to **BHE Authentication** generates a new token and requires you to update the `auth.json` file and disable IWA in the `settings.json` file.
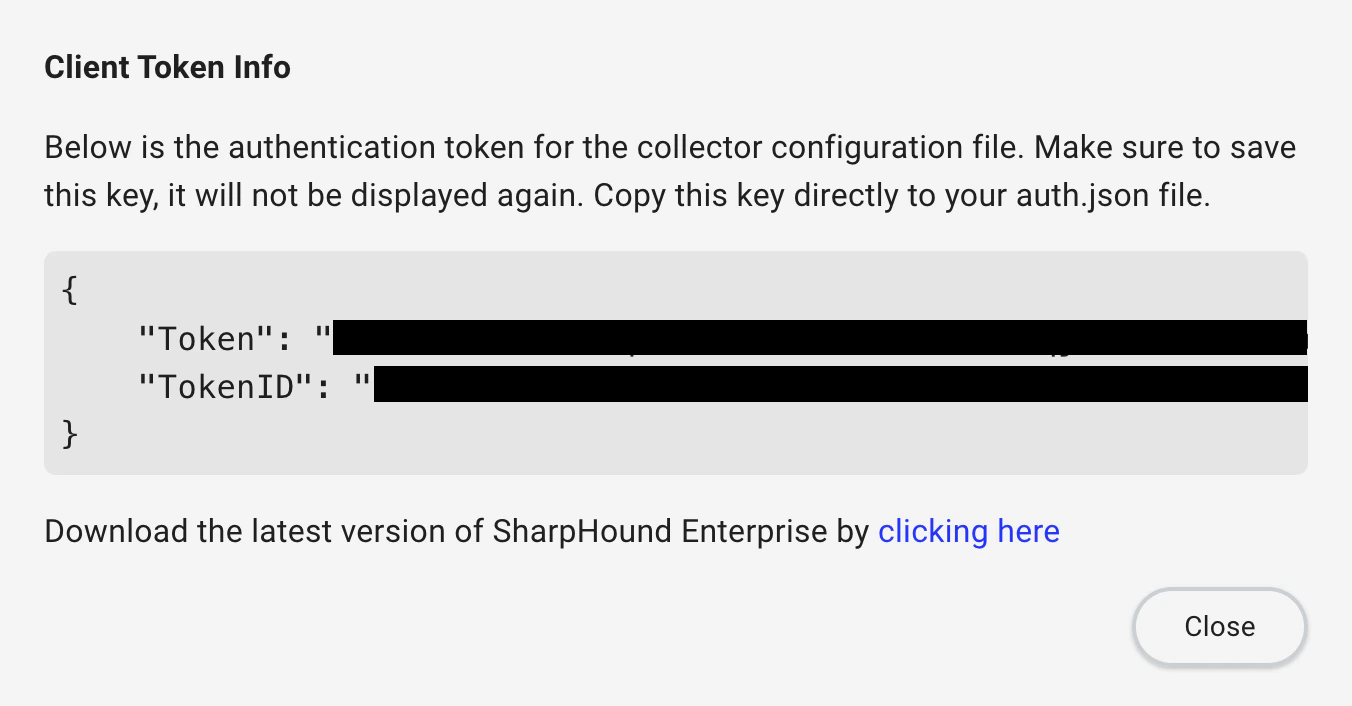
A *Client Token Info* window will appear with authentication credentials. Copy and save the token information before closing.
The token information is required to [configure](/install-data-collector/install-sharphound/local-configuration#auth-json) the SharpHound Enterprise collector application in the `auth.json` file.
4. Click **Create**.
A pop-up window will appear and display the client token (for BHE Authentication) or client ID information (for Integrated Windows Authentication). Follow the instructions in it before clicking **Close**.
**Switching Authentication Methods**
If you are switching an existing SharpHound Enterprise collector client to a different authentication method, this step replaces the current credentials.
* Switching to **Integrated Windows Authentication** invalidates existing API tokens and requires you to update the `settings.json` file and remove the `auth.json` file.
* Switching to **BHE Authentication** generates a new token and requires you to update the `auth.json` file and disable IWA in the `settings.json` file.
A *Client Token Info* window will appear with authentication credentials. Copy and save the token information before closing.
The token information is required to [configure](/install-data-collector/install-sharphound/local-configuration#auth-json) the SharpHound Enterprise collector application in the `auth.json` file.
 A *Client Configuration Info* window will appear with the Client ID required to set up ADFS.
The Client ID and configuration details are required to [configure ADFS](/install-data-collector/install-sharphound/configure-adfs-iwa) and to [configure](/install-data-collector/install-sharphound/local-configuration) the SharpHound Enterprise collector application in the `settings.json` file.
A *Client Configuration Info* window will appear with the Client ID required to set up ADFS.
The Client ID and configuration details are required to [configure ADFS](/install-data-collector/install-sharphound/configure-adfs-iwa) and to [configure](/install-data-collector/install-sharphound/local-configuration) the SharpHound Enterprise collector application in the `settings.json` file.
 ## Outcome
BloodHound Enterprise displays collector clients in the table on the **Manage Clients** page with a **Status** of **Unconfigured**.
## Outcome
BloodHound Enterprise displays collector clients in the table on the **Manage Clients** page with a **Status** of **Unconfigured**.
 ## Next Steps
* SharpHound Enterprise clients:
* **BHE Authentication**: Use the token information to [configure](/install-data-collector/install-sharphound/local-configuration#auth-json) the SharpHound Enterprise collector application in the `auth.json` file.
* **Integrated Windows Authentication**: Follow the [ADFS configuration guide](/install-data-collector/install-sharphound/configure-adfs-iwa) to set up ADFS, then [configure](/install-data-collector/install-sharphound/local-configuration#settings-json) the SharpHound Enterprise collector application in the `settings.json` file.
* AzureHound Enterprise clients:
* Use the token information to [configure](/install-data-collector/install-azurehound/create-configuration) the AzureHound collector application.
## Next Steps
* SharpHound Enterprise clients:
* **BHE Authentication**: Use the token information to [configure](/install-data-collector/install-sharphound/local-configuration#auth-json) the SharpHound Enterprise collector application in the `auth.json` file.
* **Integrated Windows Authentication**: Follow the [ADFS configuration guide](/install-data-collector/install-sharphound/configure-adfs-iwa) to set up ADFS, then [configure](/install-data-collector/install-sharphound/local-configuration#settings-json) the SharpHound Enterprise collector application in the `settings.json` file.
* AzureHound Enterprise clients:
* Use the token information to [configure](/install-data-collector/install-azurehound/create-configuration) the AzureHound collector application.