## Purpose
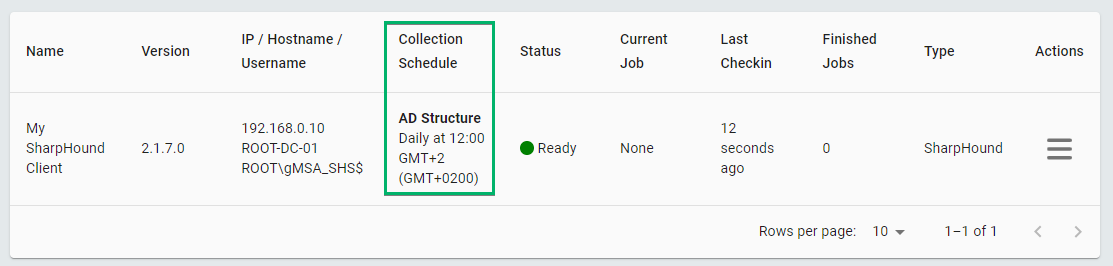
This article explains how to configure a data collector client to run on a schedule. Administrators should use it when deploying a new client or adding an additional schedule to an existing client.
## Purpose
This article explains how to configure a data collector client to run on a schedule. Administrators should use it when deploying a new client or adding an additional schedule to an existing client.
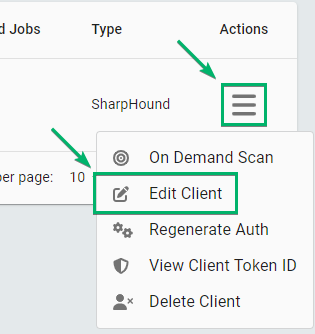
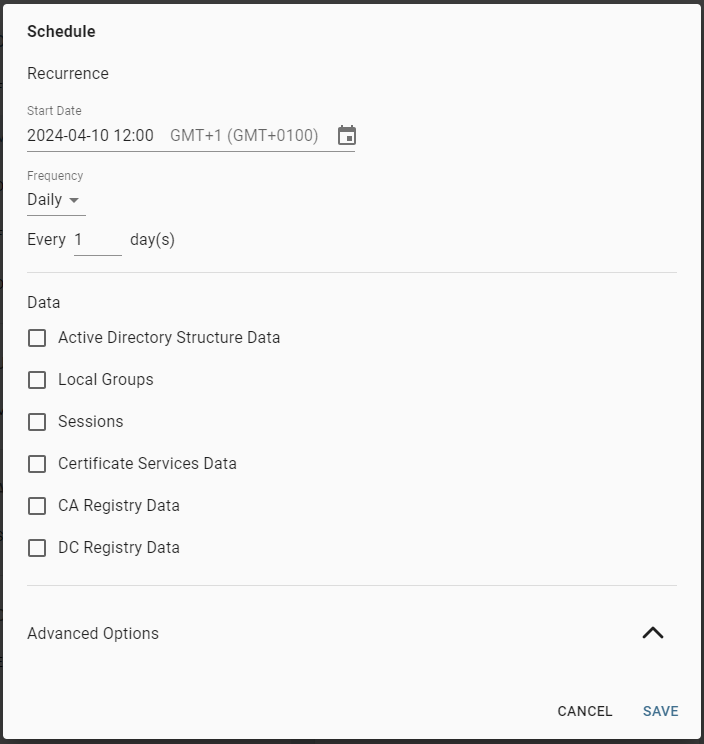
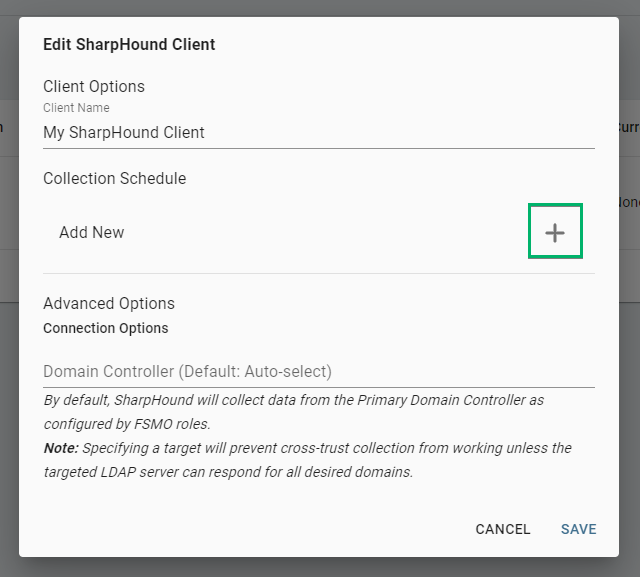 2. Configure the following details in the **Schedule** window:
* **Start Date**: The time at which the first collection should run
* **Frequency**: The frequency at which the collection should run
* **Data**: The type of data that the schedule collects, see:
* [SharpHound Data and Permissions](/collect-data/sharphound-data-permissions)
* [AzureHound Data and Permissions](/collect-data/azurehound-data-permissions)
* **Advanced Options**:
2. Configure the following details in the **Schedule** window:
* **Start Date**: The time at which the first collection should run
* **Frequency**: The frequency at which the collection should run
* **Data**: The type of data that the schedule collects, see:
* [SharpHound Data and Permissions](/collect-data/sharphound-data-permissions)
* [AzureHound Data and Permissions](/collect-data/azurehound-data-permissions)
* **Advanced Options**:
 | **Option** | **Description** |
| ------------------------------------------------------------------------ | ----------------------------------------------------------------------------------------------------------------------------------------------------------------------------------------------------------------------------------------------------------------------------------------------------------------------------------------------------------------------------------------------------------------------------------------------------------------------------------------------- |
| Data (Required) | Multi-select option for the different types of collection available. See [SharpHound Data Collection and Permissions](/collect-data/permissions) for details on the data collected and permissions necessary for each. |
| Domain controller | By default, SharpHound automatically selects a Domain Controller for LDAP queries. Specifying a Domain Controller hostname or FQDN here will define the default value used for this scan or schedule.
| **Option** | **Description** |
| ------------------------------------------------------------------------ | ----------------------------------------------------------------------------------------------------------------------------------------------------------------------------------------------------------------------------------------------------------------------------------------------------------------------------------------------------------------------------------------------------------------------------------------------------------------------------------------------- |
| Data (Required) | Multi-select option for the different types of collection available. See [SharpHound Data Collection and Permissions](/collect-data/permissions) for details on the data collected and permissions necessary for each. |
| Domain controller | By default, SharpHound automatically selects a Domain Controller for LDAP queries. Specifying a Domain Controller hostname or FQDN here will define the default value used for this scan or schedule.If not set, SharpHound will utilize the value set in the client configuration.
We recommend not configuring a Domain Controller manually. | | Target Local Group and/or User Session Collection by Organizational Unit | Define one or more OUs within a domain to only collect Local Group and Session data from computers contained within the specified OUs and their descendants.
If left empty, *SharpHound will collect from all OUs.*
If defined, the schedule or On Demand Scan will not collect AD structure data. A dedicated schedule or On Demand Scan must therefore be created for AD structure collection.
*Note: Not supported with multi-domain collections.* | | Scope Collection to Multiple Domains | Utilize trust relationships in your environment to collect data from multiple domains.
If left empty, SharpHound will collect from the domain to which the Service Account belongs.
SharpHound supports two options:
\* Define a specific list of domains from which to collect data.
\* Collect data from all domains within the forest that the SharpHound service account belongs.
*Note: Multi-domain collections cannot be scoped by OU.* | 3. Click **Save** in the **Schedule** window. 4. Click **Save** in the **Edit SharpHound Client** window.