> ## Documentation Index
> Fetch the complete documentation index at: https://bloodhound.specterops.io/llms.txt
> Use this file to discover all available pages before exploring further.
# Rules
> Learn how to create, manage, and optimize rules in Privilege Zones to enhance BloodHound's analysis.
 Rules are instructions that associate objects with zones and labels based on object ID, object relationships (expansion), and Cypher queries. BloodHound applies any rule changes during the next analysis operation.
**Zone** rules provide a logical method of ensuring objects appear in the appropriate zone using either a Cypher query or by searching for an object ID. If an object has been added to multiple zones, the most critical zone in your defined hierarchy takes precedence.
**Label** rules provide a flexible method of tagging objects in an environment. Objects can have multiple labels and you can use those labels to search and filter using Cypher in the **Explore** page.
If your rules don't show expected objects, see [Troubleshoot missing objects](/analyze-data/privilege-zones/rules#troubleshoot-missing-objects).
### Types
Rules are instructions that automatically tag objects into zones or labels. Think of them as the "how" behind the tagging process.
* **Object rules** target specific objects and their related objects through "expansion"
* **Cypher rules** tag objects based on custom query results
* [**Default rules**](/analyze-data/privilege-zones/default-rules) are system-managed and tag critical objects automatically
## Rule expansion
Rules automatically include related objects based on the type of object that you select, expanding through relationships to tag additional objects ([*some exceptions apply*](#control-of-tagged-object-expansion)).
This "expansion" saves you time by tagging entire groups or organizational units at once. The following sections describe how different object types expand during the tagging process.
You can interrupt automatic inclusion of additional objects into Privilege Zones by requiring manual certification of the additional objects. See [Certification](/analyze-data/privilege-zones/certification) to learn more.
### Group-like expansion
Objects that behave like groups in Active Directory include all contained members within the zone/label. These include the following type (edge) relationships:
* Group ([`MemberOf`](/resources/edges/member-of))
* AZRole ([`AZHasRole`](/resources/edges/az-has-role), `AZRoleElligible`)
* AZGroup ([`AZMemberOf`](/resources/edges/az-member-of))
### Structured expansion
Objects that provide structural organization include all contained objects within the zone/label. These include the following type (edge) relationships:
* Domain ([`Contains`](/resources/edges/contains))
For non-default rules only.
* OU ([`Contains`](/resources/edges/contains))
* AZSubscription ([`AZContains`](/resources/edges/az-contains))
* AZManagementGroup ([`AZContains`](/resources/edges/az-contains))
* AZAdministrativeUnit ([`AZContains`](/resources/edges/az-contains))
### Control of tagged object expansion
During the tagging process for zones, the final step involves tagging all objects that contain (or provide external control of) the selected objects.
For example, in Active Directory this means that all OUs, Containers, and GPOs that apply to any Tier Zero object are *also* tagged to the Tier Zero zone.
If any OUs or Containers are tagged in the last step of the tagging process only (not because you explicitly selected them), the process won't expand to tag other contained objects.
## Define a rule
The process and screens for creating and editing rules is nearly the same for zones and labels. The primary difference is that [certification](/analyze-data/privilege-zones/certification) is a BloodHound Enterprise feature available for zones only.
Unless you're defining a rule as part of the zone or label creation process, be sure to select a specific zone or label on the **Zone Builder** page first.
If you're defining a rule as part of the [zone or label](/analyze-data/privilege-zones/zones) creation process, skip to **Configure rule details** below.
1. In the left menu, click **Privilege Zones**.
2. Click the **Zones** or **Labels** tab and select a specific zone or label.
If you don't select a zone or label first, the new rule will be associated with the default zone or label selection when you open the page (top position in the **Zones** or **Labels** summary and detail view).
1. Click **Create Rule**.
2. Enter all relevant information for the rule:
Review [rule expansion](/analyze-data/privilege-zones/rules#rule-expansion) for more information about rule behavior.
| Field | Required? | Description |
| ----------------------- | :-------: | ------------------------------------------------------------------------------------------------------------------------------------------------- |
| Name | Yes | A unique name for the rule (e.g., PCI Assets) |
| Description | No | A brief description of the rule's purpose and scope (e.g., PCI assets) |
| Automatic Certification | No | An option in Enterprise Edition to choose how new objects are [certified](/analyze-data/privilege-zones/certification) (available for zones only) |
| Rule Type | Yes | The type of rule to use (e.g., Object ID or Cypher) |
**Automatic Certification options**
See [Certification](/analyze-data/privilege-zones/certification) to learn more.
* **Direct Objects**: Only the objects directly matched by the rule are certified automatically (excludes objects added through [expansion](/analyze-data/privilege-zones/rules#rule-expansion), such as OUs and GPOs). These objects are shown separately in the **Sample Results** panel.
* **All Objects**: Every object (including those tied to direct objects through expansion) is certified automatically
* **Off**: All certification is manual
Rules are instructions that associate objects with zones and labels based on object ID, object relationships (expansion), and Cypher queries. BloodHound applies any rule changes during the next analysis operation.
**Zone** rules provide a logical method of ensuring objects appear in the appropriate zone using either a Cypher query or by searching for an object ID. If an object has been added to multiple zones, the most critical zone in your defined hierarchy takes precedence.
**Label** rules provide a flexible method of tagging objects in an environment. Objects can have multiple labels and you can use those labels to search and filter using Cypher in the **Explore** page.
If your rules don't show expected objects, see [Troubleshoot missing objects](/analyze-data/privilege-zones/rules#troubleshoot-missing-objects).
### Types
Rules are instructions that automatically tag objects into zones or labels. Think of them as the "how" behind the tagging process.
* **Object rules** target specific objects and their related objects through "expansion"
* **Cypher rules** tag objects based on custom query results
* [**Default rules**](/analyze-data/privilege-zones/default-rules) are system-managed and tag critical objects automatically
## Rule expansion
Rules automatically include related objects based on the type of object that you select, expanding through relationships to tag additional objects ([*some exceptions apply*](#control-of-tagged-object-expansion)).
This "expansion" saves you time by tagging entire groups or organizational units at once. The following sections describe how different object types expand during the tagging process.
You can interrupt automatic inclusion of additional objects into Privilege Zones by requiring manual certification of the additional objects. See [Certification](/analyze-data/privilege-zones/certification) to learn more.
### Group-like expansion
Objects that behave like groups in Active Directory include all contained members within the zone/label. These include the following type (edge) relationships:
* Group ([`MemberOf`](/resources/edges/member-of))
* AZRole ([`AZHasRole`](/resources/edges/az-has-role), `AZRoleElligible`)
* AZGroup ([`AZMemberOf`](/resources/edges/az-member-of))
### Structured expansion
Objects that provide structural organization include all contained objects within the zone/label. These include the following type (edge) relationships:
* Domain ([`Contains`](/resources/edges/contains))
For non-default rules only.
* OU ([`Contains`](/resources/edges/contains))
* AZSubscription ([`AZContains`](/resources/edges/az-contains))
* AZManagementGroup ([`AZContains`](/resources/edges/az-contains))
* AZAdministrativeUnit ([`AZContains`](/resources/edges/az-contains))
### Control of tagged object expansion
During the tagging process for zones, the final step involves tagging all objects that contain (or provide external control of) the selected objects.
For example, in Active Directory this means that all OUs, Containers, and GPOs that apply to any Tier Zero object are *also* tagged to the Tier Zero zone.
If any OUs or Containers are tagged in the last step of the tagging process only (not because you explicitly selected them), the process won't expand to tag other contained objects.
## Define a rule
The process and screens for creating and editing rules is nearly the same for zones and labels. The primary difference is that [certification](/analyze-data/privilege-zones/certification) is a BloodHound Enterprise feature available for zones only.
Unless you're defining a rule as part of the zone or label creation process, be sure to select a specific zone or label on the **Zone Builder** page first.
If you're defining a rule as part of the [zone or label](/analyze-data/privilege-zones/zones) creation process, skip to **Configure rule details** below.
1. In the left menu, click **Privilege Zones**.
2. Click the **Zones** or **Labels** tab and select a specific zone or label.
If you don't select a zone or label first, the new rule will be associated with the default zone or label selection when you open the page (top position in the **Zones** or **Labels** summary and detail view).
1. Click **Create Rule**.
2. Enter all relevant information for the rule:
Review [rule expansion](/analyze-data/privilege-zones/rules#rule-expansion) for more information about rule behavior.
| Field | Required? | Description |
| ----------------------- | :-------: | ------------------------------------------------------------------------------------------------------------------------------------------------- |
| Name | Yes | A unique name for the rule (e.g., PCI Assets) |
| Description | No | A brief description of the rule's purpose and scope (e.g., PCI assets) |
| Automatic Certification | No | An option in Enterprise Edition to choose how new objects are [certified](/analyze-data/privilege-zones/certification) (available for zones only) |
| Rule Type | Yes | The type of rule to use (e.g., Object ID or Cypher) |
**Automatic Certification options**
See [Certification](/analyze-data/privilege-zones/certification) to learn more.
* **Direct Objects**: Only the objects directly matched by the rule are certified automatically (excludes objects added through [expansion](/analyze-data/privilege-zones/rules#rule-expansion), such as OUs and GPOs). These objects are shown separately in the **Sample Results** panel.
* **All Objects**: Every object (including those tied to direct objects through expansion) is certified automatically
* **Off**: All certification is manual
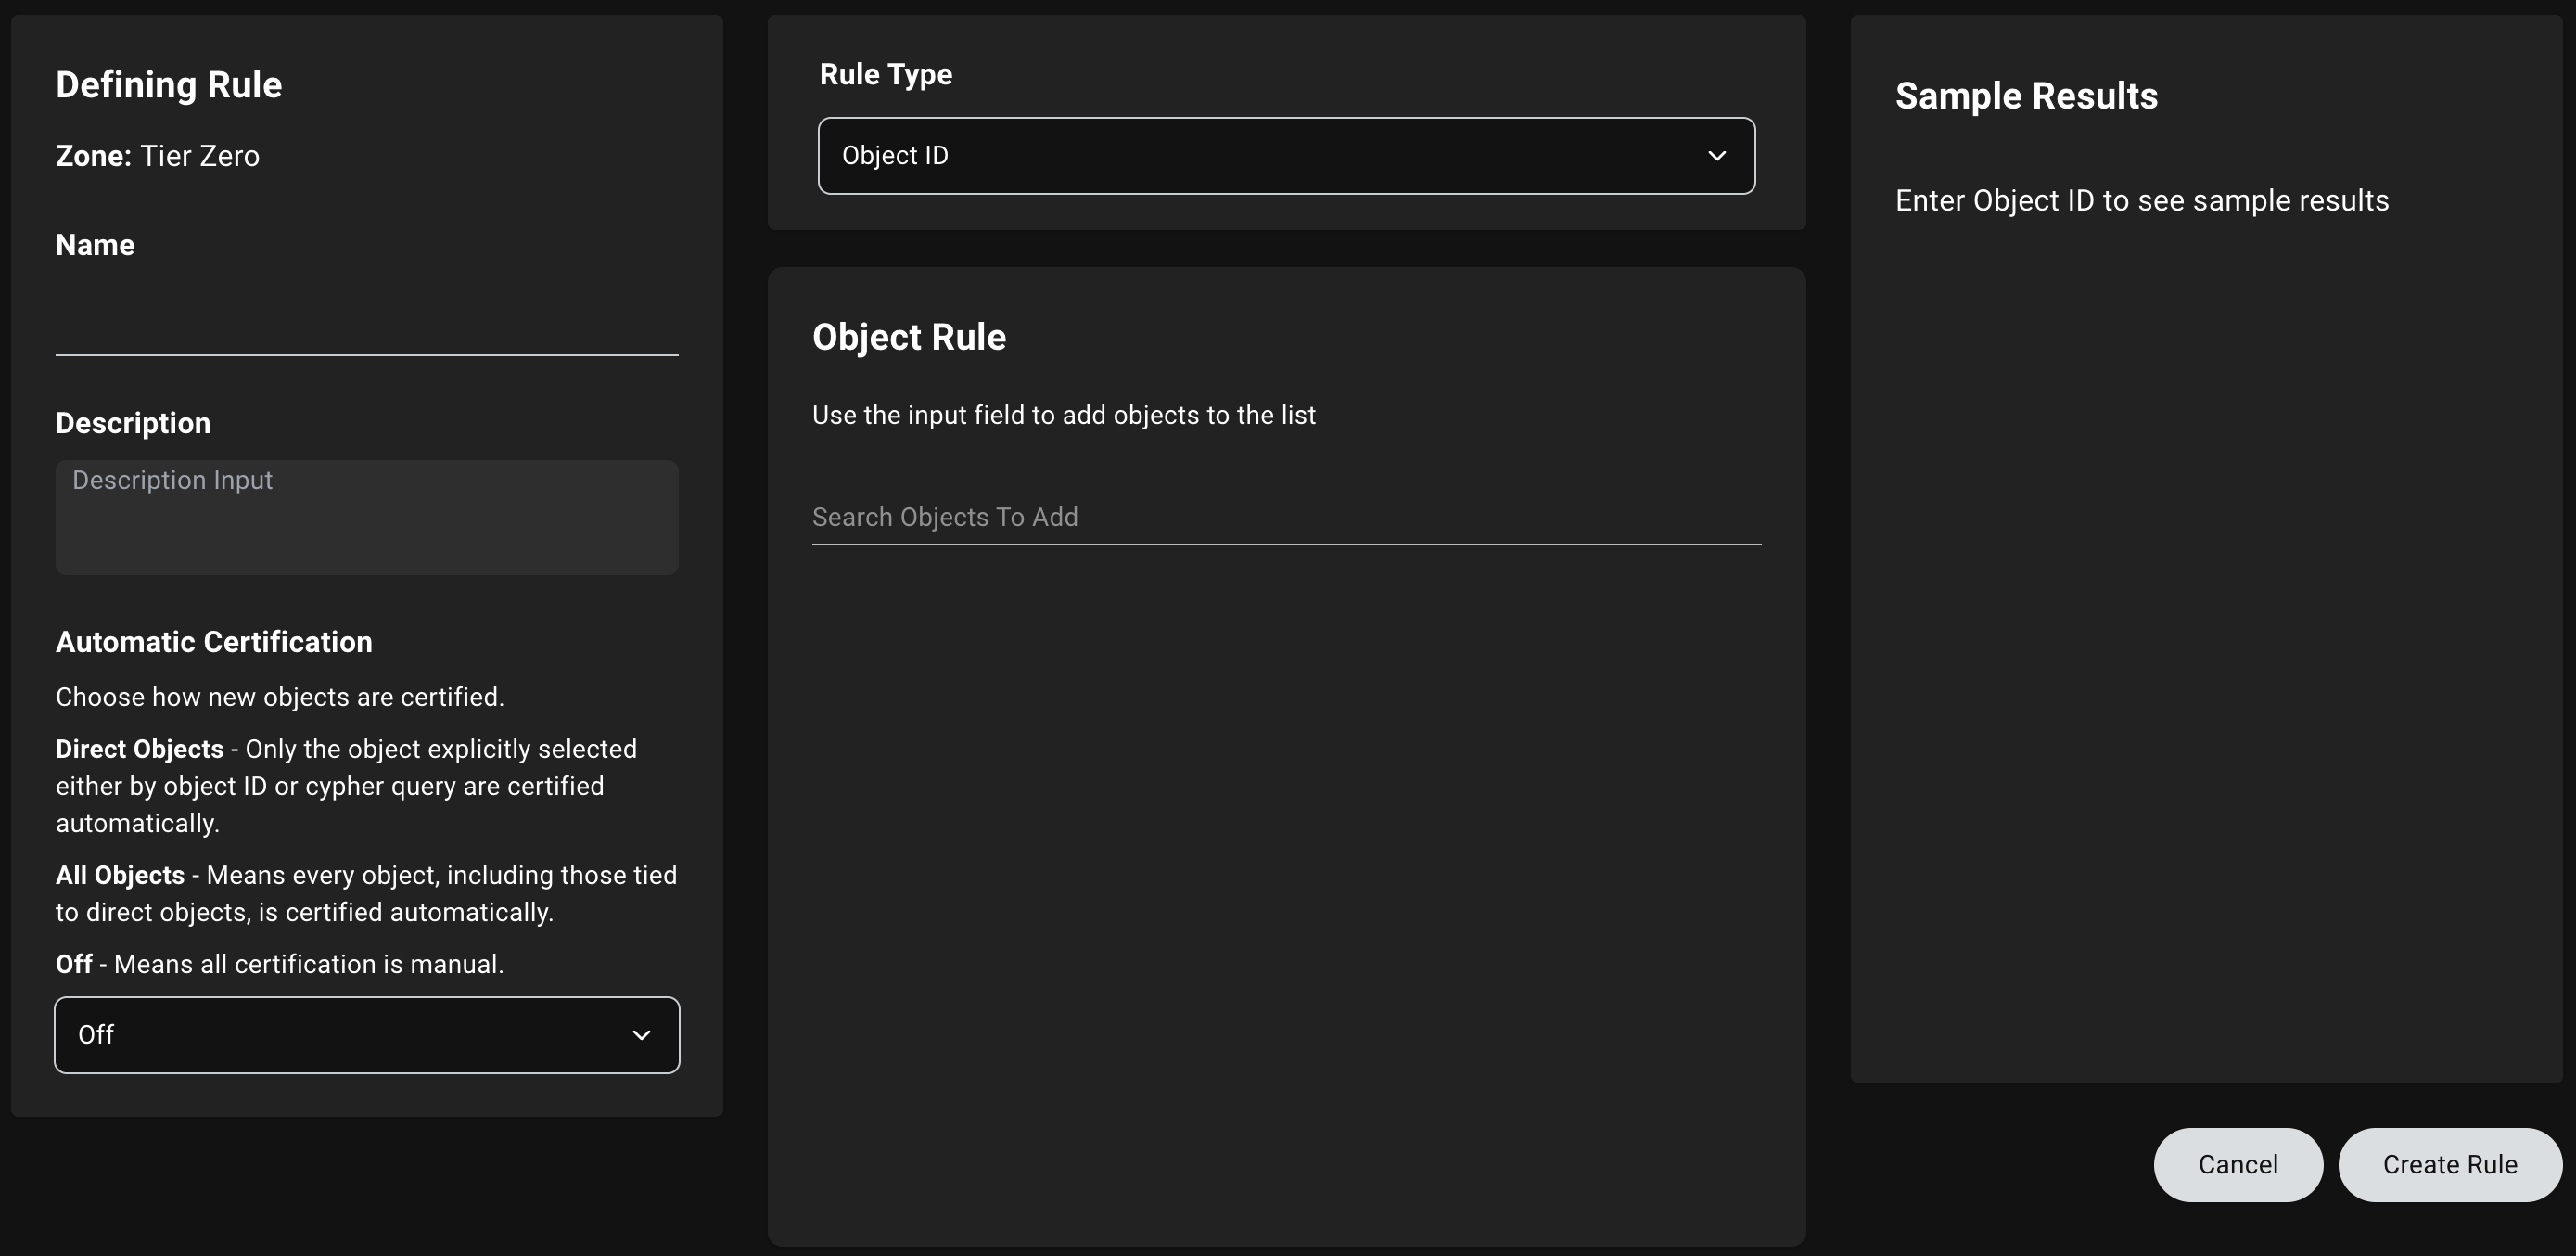 **Rule type configuration details**
When you switch between **Object ID** and **Cypher** while working on rules, BloodHound preserves the current state for each rule type until you save the rule or leave the page. If you navigate away before saving, BloodHound clears that temporary state.
1. In the **Object Rule** panel, type to search for an object by name or ID.
2. Click the object to add it to the list of targeted objects. You must select at least one object to create the rule.
The **Sample Results** panel displays up to 200 sample results, separating directly selected objects from objects selected through [expansion](/analyze-data/privilege-zones/rules#rule-expansion). This helps you understand why your results may include more objects than initially expected.
If objects appear in the **Sample Results** panel during rule creation but don't show in the zone after saving, see [Zone precedence conflicts](/analyze-data/privilege-zones/rules#zone-precedence-conflicts) in the troubleshooting section below—a higher-priority zone may be claiming those objects.
**Rule type configuration details**
When you switch between **Object ID** and **Cypher** while working on rules, BloodHound preserves the current state for each rule type until you save the rule or leave the page. If you navigate away before saving, BloodHound clears that temporary state.
1. In the **Object Rule** panel, type to search for an object by name or ID.
2. Click the object to add it to the list of targeted objects. You must select at least one object to create the rule.
The **Sample Results** panel displays up to 200 sample results, separating directly selected objects from objects selected through [expansion](/analyze-data/privilege-zones/rules#rule-expansion). This helps you understand why your results may include more objects than initially expected.
If objects appear in the **Sample Results** panel during rule creation but don't show in the zone after saving, see [Zone precedence conflicts](/analyze-data/privilege-zones/rules#zone-precedence-conflicts) in the troubleshooting section below—a higher-priority zone may be claiming those objects.
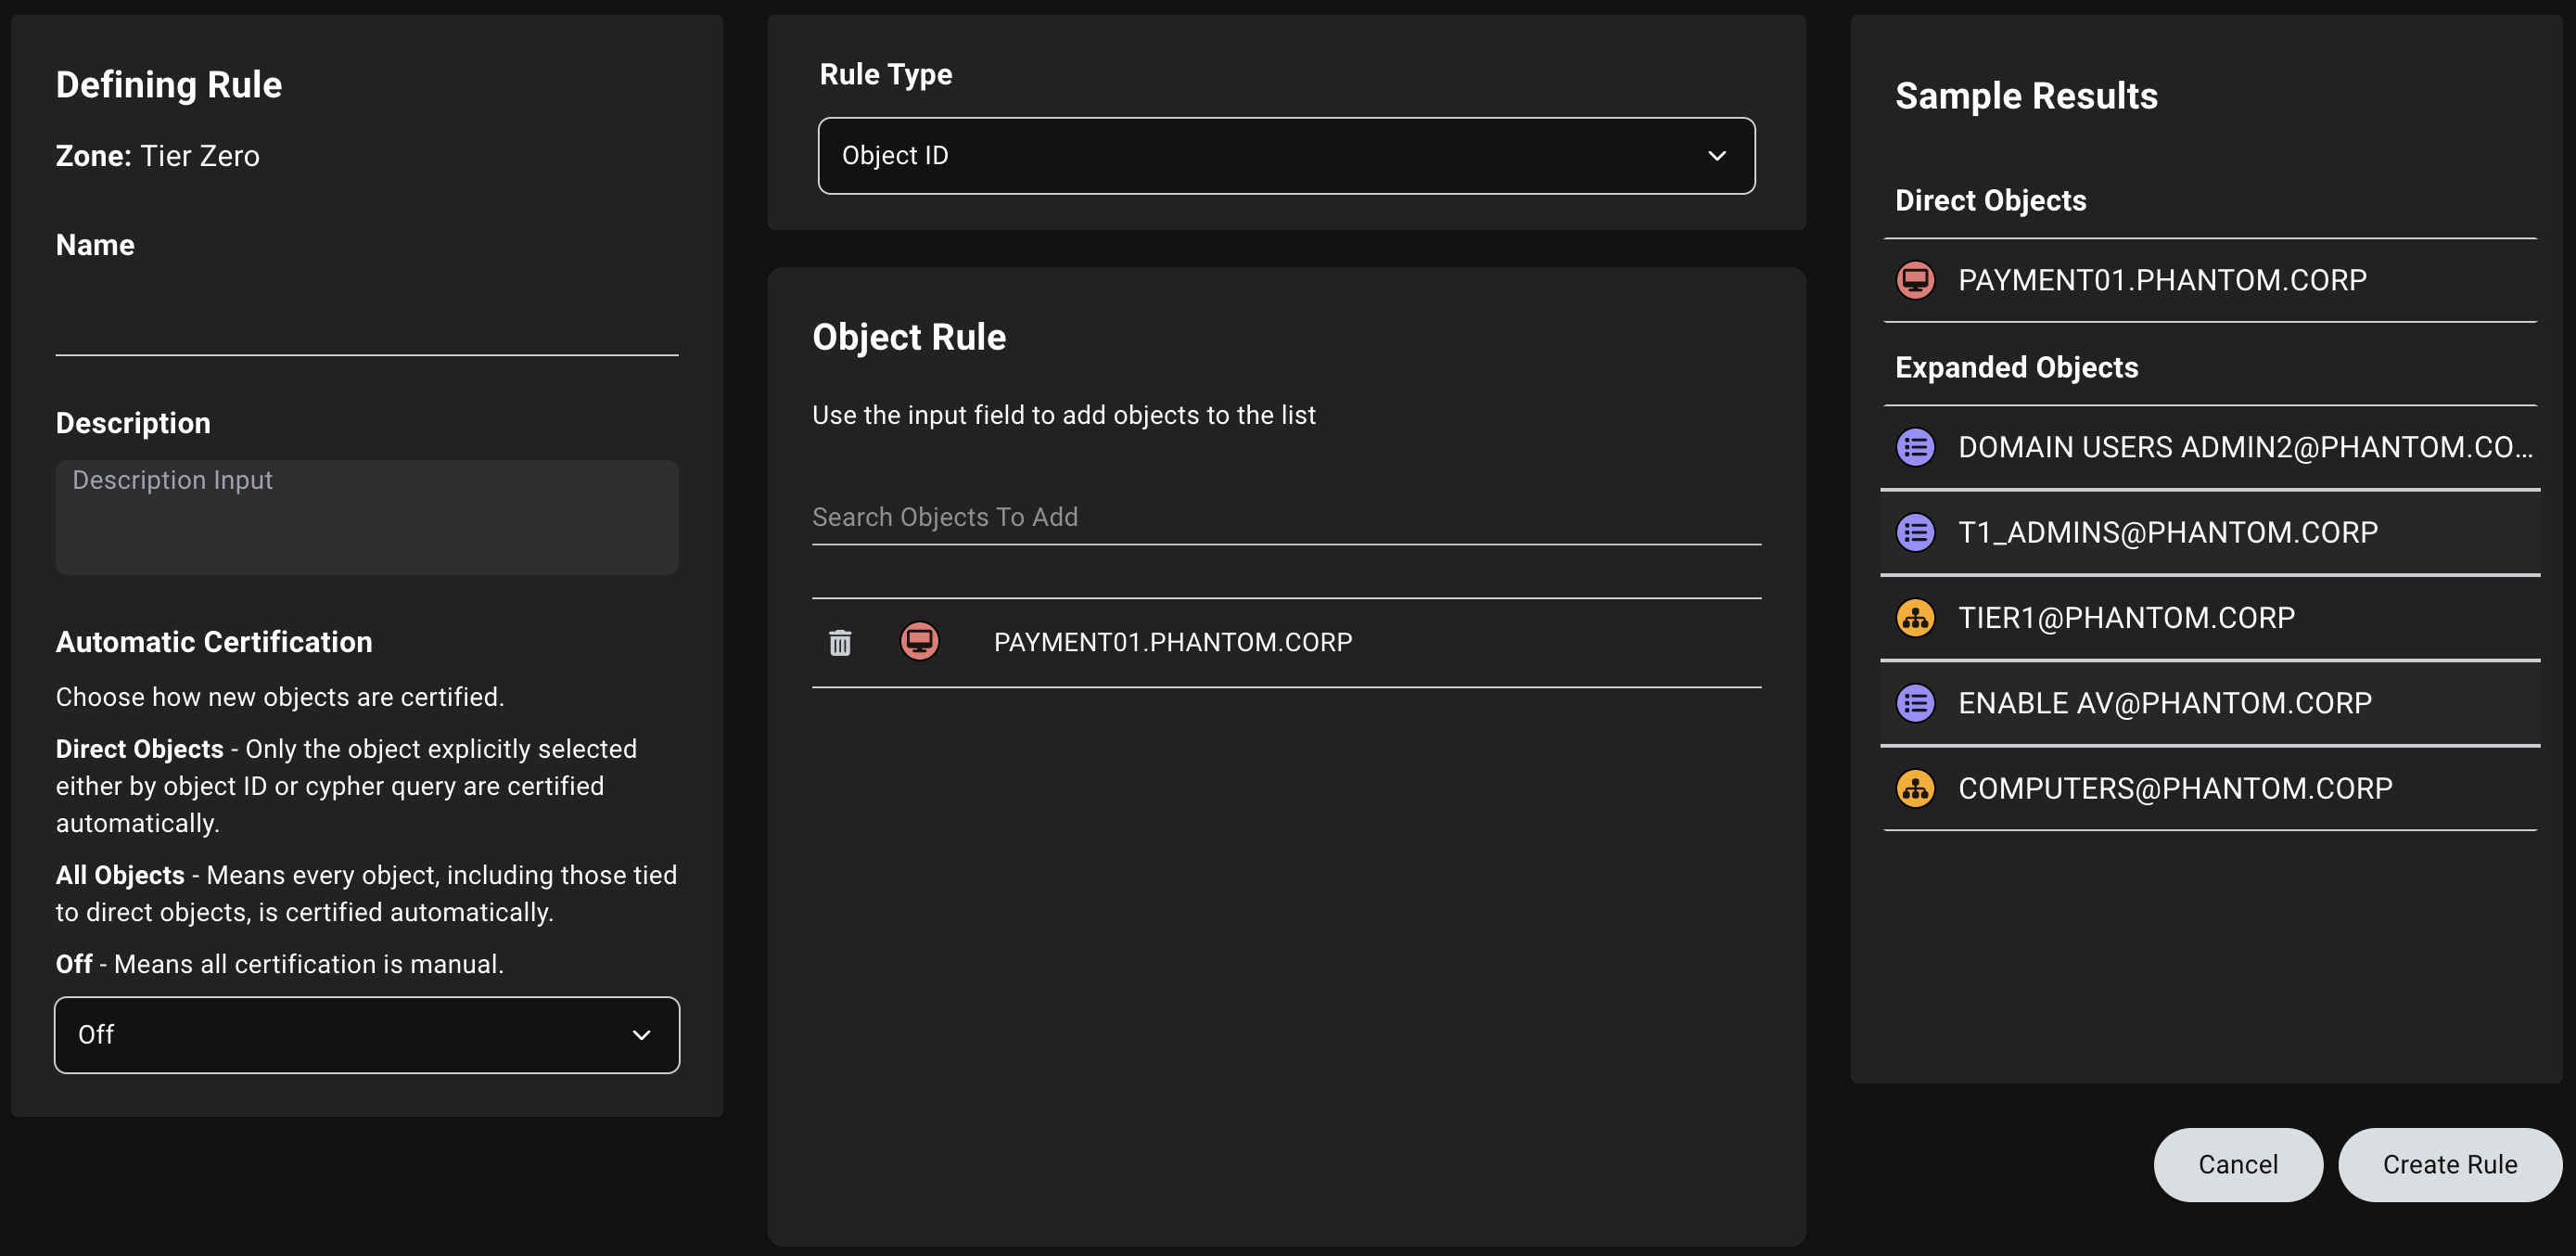 1. Enter a Cypher query into the **Cypher Search** box.
If you need to reference existing Tier Zero membership in a Cypher rule, match on the `Tag_Tier_Zero` label rather than inspecting `system_tags` properties with patterns such as `coalesce(n.system_tags, [])`.
For example, to return Tier Zero users, use `MATCH (n:User:Tag_Tier_Zero) RETURN n`.
2. Click **Run** below the Cypher query box. You must run the query before you can create the rule.
If you change the query after running it, click **Run** again before you save the rule.
The **Sample Results** panel displays up to 200 sample results, separating directly selected objects from objects selected through [expansion](/analyze-data/privilege-zones/rules#rule-expansion). This helps you understand why your results may include more objects than initially expected.
If objects appear in the **Sample Results** panel during rule creation but don't show in the zone after saving, see [Zone precedence conflicts](/analyze-data/privilege-zones/rules#zone-precedence-conflicts) in the troubleshooting section below—a higher-priority zone may be claiming those objects.
1. Enter a Cypher query into the **Cypher Search** box.
If you need to reference existing Tier Zero membership in a Cypher rule, match on the `Tag_Tier_Zero` label rather than inspecting `system_tags` properties with patterns such as `coalesce(n.system_tags, [])`.
For example, to return Tier Zero users, use `MATCH (n:User:Tag_Tier_Zero) RETURN n`.
2. Click **Run** below the Cypher query box. You must run the query before you can create the rule.
If you change the query after running it, click **Run** again before you save the rule.
The **Sample Results** panel displays up to 200 sample results, separating directly selected objects from objects selected through [expansion](/analyze-data/privilege-zones/rules#rule-expansion). This helps you understand why your results may include more objects than initially expected.
If objects appear in the **Sample Results** panel during rule creation but don't show in the zone after saving, see [Zone precedence conflicts](/analyze-data/privilege-zones/rules#zone-precedence-conflicts) in the troubleshooting section below—a higher-priority zone may be claiming those objects.
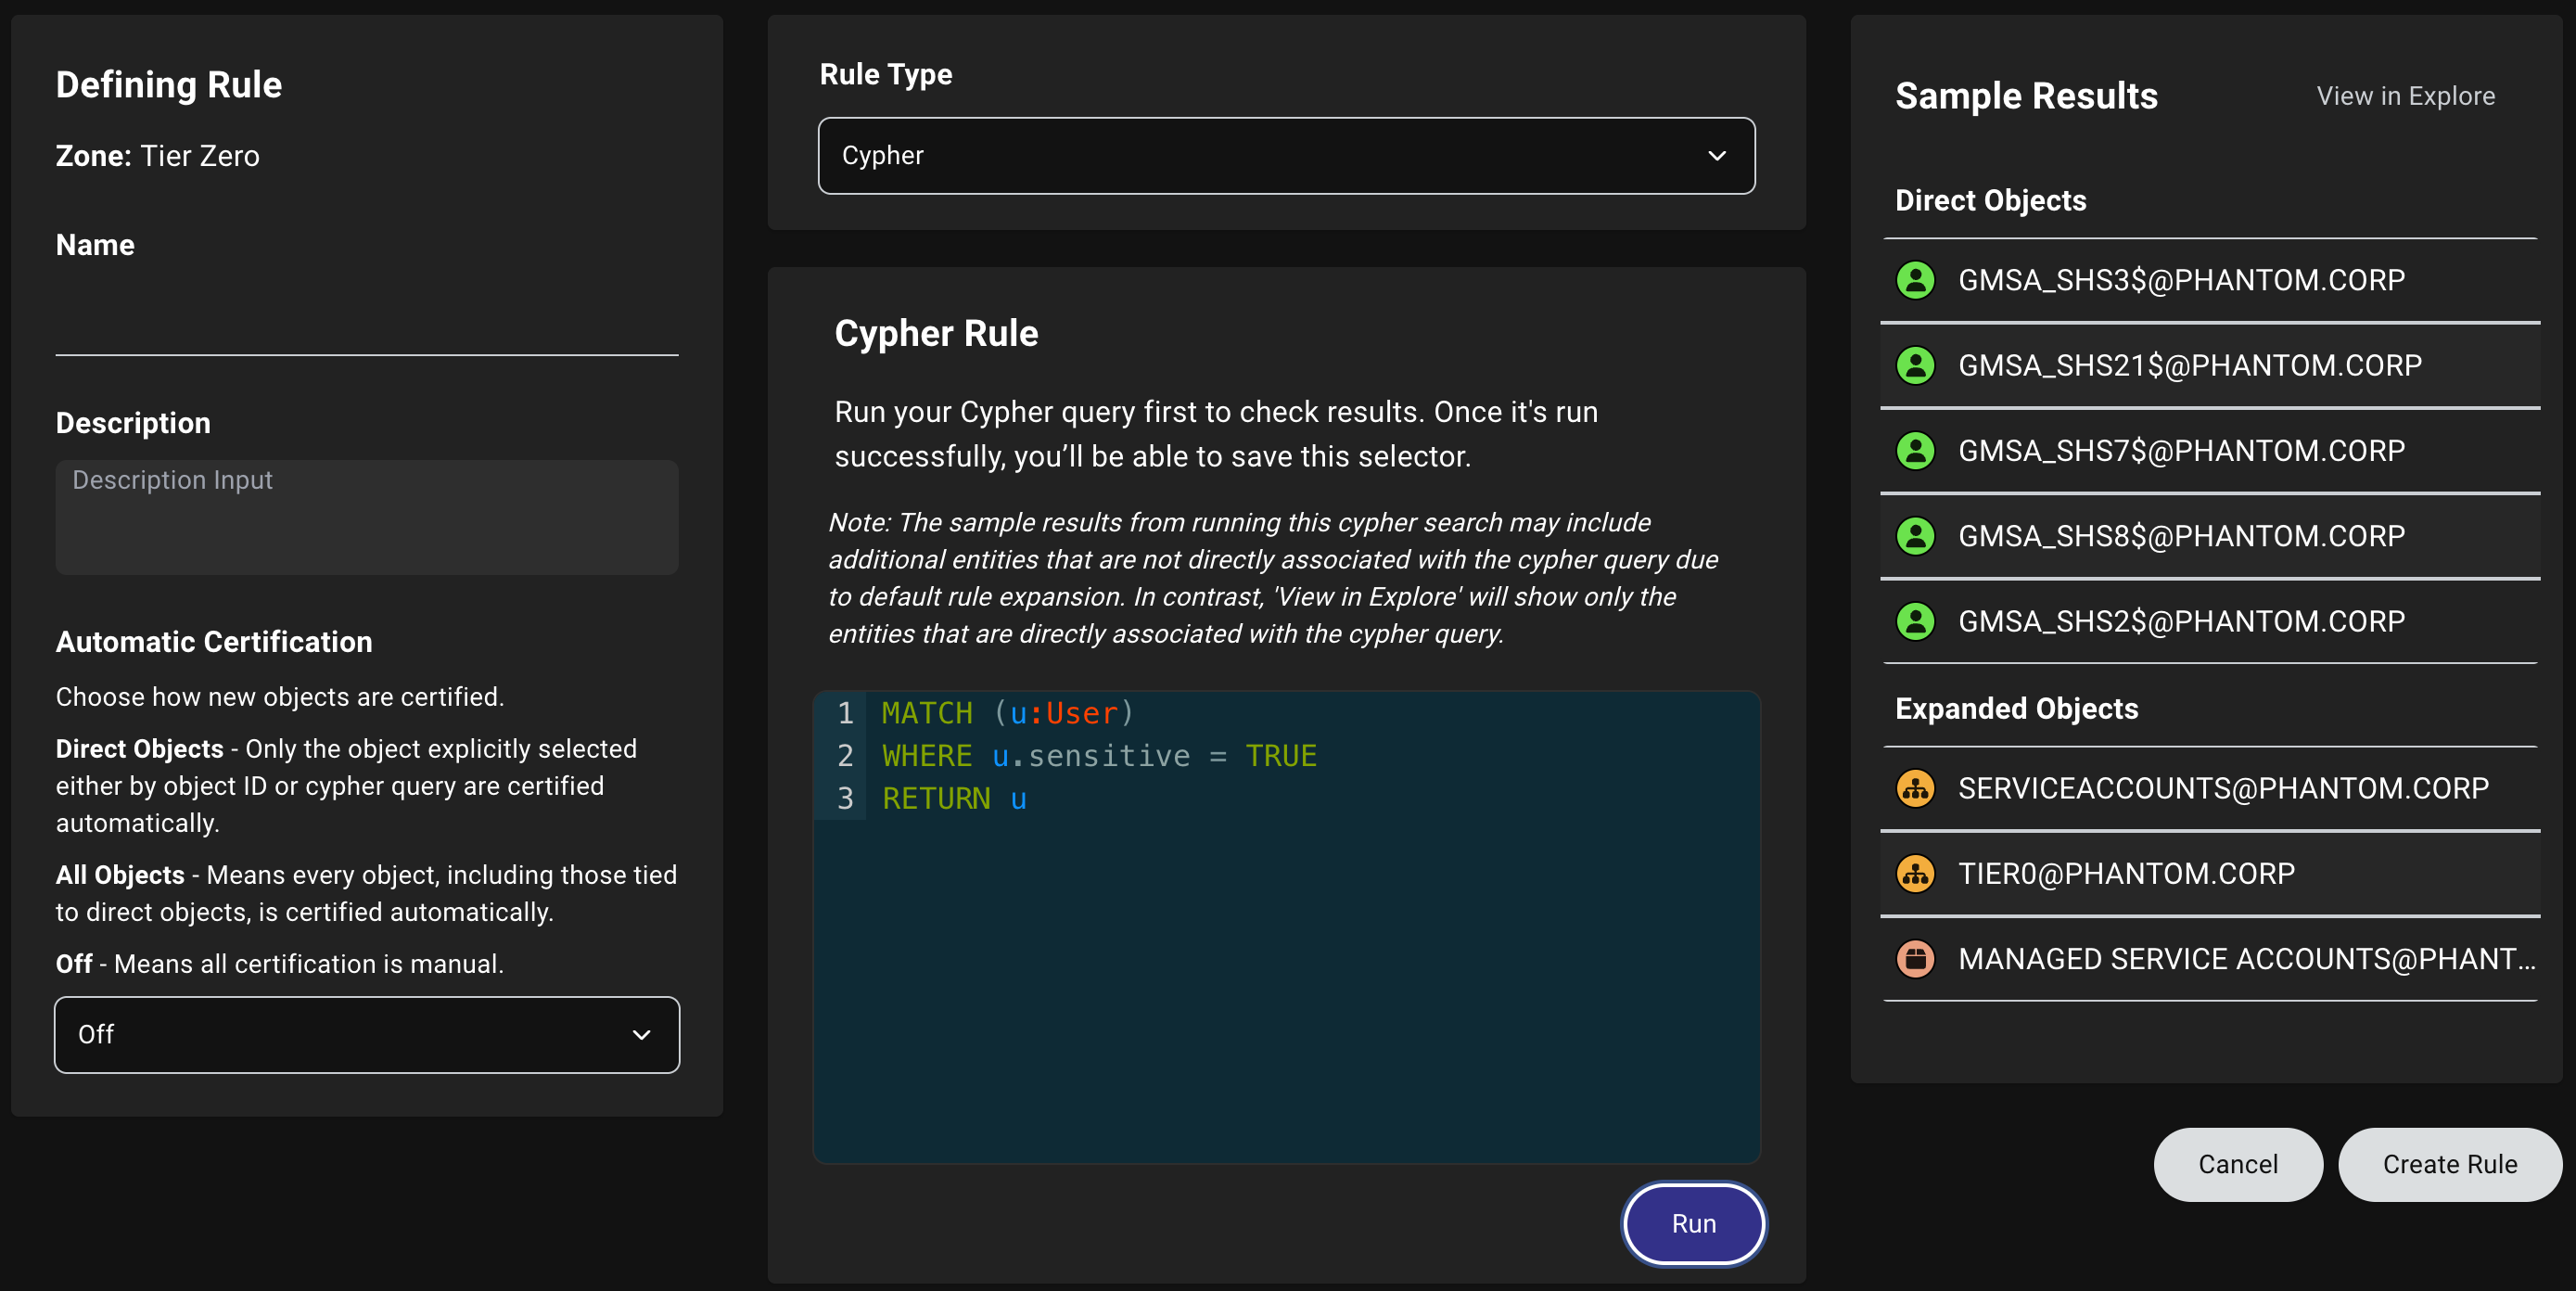 If the query returns no results, BloodHound asks you to confirm before saving the rule. This is useful when you expect a future data collection or environment change to produce matching objects.
*(Optional)* Click **View in Explore** to pivot to the **Explore** page and see results in the graph view.
Adding the following object types automatically includes more objects according to the definition below. The **Sample Results** panel displays these expanded objects separately from the directly selected objects.
* `OU/Container` → All objects contained in the OU/container
* `Group` → All objects with membership in the Group
* `AZResourceGroup`/`AZSubscription` → All objects contained in the RG/Sub
* `AZGroup` → All objects with membership in the group
* `AZRole` → All objects with role assignments (or eligibility)
Click **Create Rule** to finish creating the rule.
## Edit or delete a rule
To edit or delete a rule, follow these steps:
Only users with the appropriate [permissions](/manage-bloodhound/auth/users-and-roles) can make changes. You cannot delete [default rules](/analyze-data/privilege-zones/default-rules).
1. In the left menu, click **Privilege Zones**.
2. Click the **Zones** or **Labels** tab and open the **Detail View**.
3. Select the zone or label that contains the rule that you want to edit or delete and select it.
4. Use one of the following methods to locate the rule you want to edit or delete:
1. Enter the name of the rule in the search bar.
2. Select the rule from the search results.
3. Click **Edit Rule** to open the rule details.
1. Enter the object name or ID.
2. Select the object.
3. In the right panel, click the **Object** tab and expand the **Rule** accordion.
4. Click the ellipsis () beside the relevant rule and select **Edit**.
Choose one of the following options:
To edit a rule:
Only users with the appropriate [permissions](/manage-bloodhound/auth/users-and-roles) can make changes. You cannot disable some [default rules](/analyze-data/privilege-zones/default-rules).
1. Make any necessary changes to the rule configuration.
For example, you can modify the rule's name, description, rule type, and certification settings (available for zones only).
You can also disable or enable a rule by toggling the **Enabled** switch.
If you switch between **Object ID** and **Cypher** while editing the rule, BloodHound preserves the current state for each rule type until you save or leave the page.
If you edit a Cypher query, click **Run** again before you click **Save Edits**. If the rerun query returns no results, BloodHound asks you to confirm the save. If you do not rerun the updated query, BloodHound prompts you to run it before saving.
If the query returns no results, BloodHound asks you to confirm before saving the rule. This is useful when you expect a future data collection or environment change to produce matching objects.
*(Optional)* Click **View in Explore** to pivot to the **Explore** page and see results in the graph view.
Adding the following object types automatically includes more objects according to the definition below. The **Sample Results** panel displays these expanded objects separately from the directly selected objects.
* `OU/Container` → All objects contained in the OU/container
* `Group` → All objects with membership in the Group
* `AZResourceGroup`/`AZSubscription` → All objects contained in the RG/Sub
* `AZGroup` → All objects with membership in the group
* `AZRole` → All objects with role assignments (or eligibility)
Click **Create Rule** to finish creating the rule.
## Edit or delete a rule
To edit or delete a rule, follow these steps:
Only users with the appropriate [permissions](/manage-bloodhound/auth/users-and-roles) can make changes. You cannot delete [default rules](/analyze-data/privilege-zones/default-rules).
1. In the left menu, click **Privilege Zones**.
2. Click the **Zones** or **Labels** tab and open the **Detail View**.
3. Select the zone or label that contains the rule that you want to edit or delete and select it.
4. Use one of the following methods to locate the rule you want to edit or delete:
1. Enter the name of the rule in the search bar.
2. Select the rule from the search results.
3. Click **Edit Rule** to open the rule details.
1. Enter the object name or ID.
2. Select the object.
3. In the right panel, click the **Object** tab and expand the **Rule** accordion.
4. Click the ellipsis () beside the relevant rule and select **Edit**.
Choose one of the following options:
To edit a rule:
Only users with the appropriate [permissions](/manage-bloodhound/auth/users-and-roles) can make changes. You cannot disable some [default rules](/analyze-data/privilege-zones/default-rules).
1. Make any necessary changes to the rule configuration.
For example, you can modify the rule's name, description, rule type, and certification settings (available for zones only).
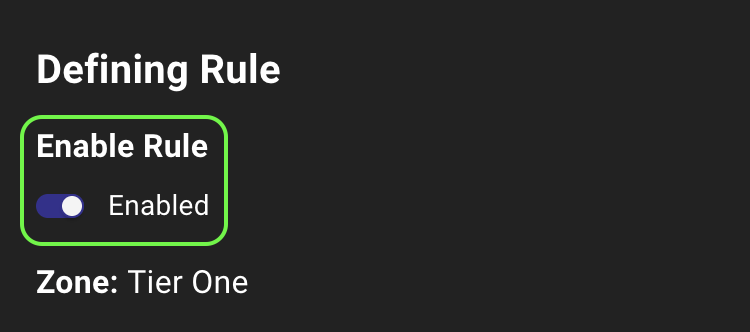
You can also disable or enable a rule by toggling the **Enabled** switch.
If you switch between **Object ID** and **Cypher** while editing the rule, BloodHound preserves the current state for each rule type until you save or leave the page.
If you edit a Cypher query, click **Run** again before you click **Save Edits**. If the rerun query returns no results, BloodHound asks you to confirm the save. If you do not rerun the updated query, BloodHound prompts you to run it before saving.
 2. Click **Save Edits** to apply your changes.
To delete a rule:
1. Click **Delete Rule** at the top of the page.
2. Confirm your action in the dialog.
2. Click **Save Edits** to apply your changes.
To delete a rule:
1. Click **Delete Rule** at the top of the page.
2. Confirm your action in the dialog.
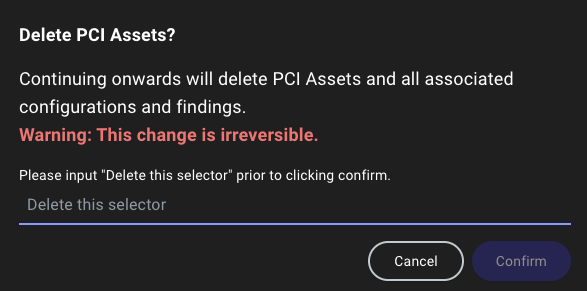 3. Click **Confirm** to delete the rule.
## Troubleshoot rules
If a rule doesn't tag the objects you expect, or you run into issues creating or saving a rule, use the following sections to identify the cause and resolve the issue.
### Domain filter mismatch
The **Domain** selector filters which objects are visible in the zone or label view. If the selected domain doesn't contain objects that match your rule criteria, the zone or label may appear empty or incomplete.
**Solution**: Check the domain selector and ensure you've selected the correct domain(s) that contain the expected objects.
### Zone precedence conflicts
When an object matches rules in multiple zones, only the highest-priority zone in your [**Zone Order**](/analyze-data/privilege-zones/zones) tags that object. Lower-priority zones won't tag the object, even if their rules match. This is why the **Sample Results** panel during [rule creation](/analyze-data/privilege-zones/rules#define-a-rule) may show objects that don't appear in your lower-priority zones—they're being tagged by a higher-priority zone instead.
For example, if an object is tagged by both a Tier Zero rule and a Tier One rule, it will only appear in the Tier Zero zone. The **Sample Results** panel would show the object as a result of your Tier One rule, but the object would only appear in the higher-priority Tier Zero zone, not in Tier One.
**Solution**: Review your **Zone Order** and check whether objects are being tagged by higher-priority zones. You can verify this by checking the higher-priority zones for the missing objects.
### Unsaved rule type changes disappeared
BloodHound preserves temporary **Object ID** and **Cypher** rule state only while you remain on the current rule page. If you leave the page before saving, BloodHound clears that temporary state.
**Solution**: Save the rule before navigating away if you want to keep your current changes.
### Cypher changes do not save
If you change a Cypher query after running it, BloodHound requires you to click **Run** again before you can save the rule. This ensures BloodHound validates the updated query and refreshes the sample results for the current rule definition.
If the query returns no results, BloodHound asks you to confirm the save. If you do not rerun the updated query, BloodHound prompts you to run it first.
**Solution**: Rerun the updated query, review the direct and expanded sample results, and then save the rule.
### Object deleted from graph
3. Click **Confirm** to delete the rule.
## Troubleshoot rules
If a rule doesn't tag the objects you expect, or you run into issues creating or saving a rule, use the following sections to identify the cause and resolve the issue.
### Domain filter mismatch
The **Domain** selector filters which objects are visible in the zone or label view. If the selected domain doesn't contain objects that match your rule criteria, the zone or label may appear empty or incomplete.
**Solution**: Check the domain selector and ensure you've selected the correct domain(s) that contain the expected objects.
### Zone precedence conflicts
When an object matches rules in multiple zones, only the highest-priority zone in your [**Zone Order**](/analyze-data/privilege-zones/zones) tags that object. Lower-priority zones won't tag the object, even if their rules match. This is why the **Sample Results** panel during [rule creation](/analyze-data/privilege-zones/rules#define-a-rule) may show objects that don't appear in your lower-priority zones—they're being tagged by a higher-priority zone instead.
For example, if an object is tagged by both a Tier Zero rule and a Tier One rule, it will only appear in the Tier Zero zone. The **Sample Results** panel would show the object as a result of your Tier One rule, but the object would only appear in the higher-priority Tier Zero zone, not in Tier One.
**Solution**: Review your **Zone Order** and check whether objects are being tagged by higher-priority zones. You can verify this by checking the higher-priority zones for the missing objects.
### Unsaved rule type changes disappeared
BloodHound preserves temporary **Object ID** and **Cypher** rule state only while you remain on the current rule page. If you leave the page before saving, BloodHound clears that temporary state.
**Solution**: Save the rule before navigating away if you want to keep your current changes.
### Cypher changes do not save
If you change a Cypher query after running it, BloodHound requires you to click **Run** again before you can save the rule. This ensures BloodHound validates the updated query and refreshes the sample results for the current rule definition.
If the query returns no results, BloodHound asks you to confirm the save. If you do not rerun the updated query, BloodHound prompts you to run it first.
**Solution**: Rerun the updated query, review the direct and expanded sample results, and then save the rule.
### Object deleted from graph
 Objects are automatically deleted from the graph if they haven't been observed within the configured retention period. BloodHound stores a timestamp on every object that updates whenever a collection includes that object or references to it. This ensures your data remains fresh and accurate over time.
By default, objects are retained for 7 days after they were last seen. For Active Directory environments with the AD recycle bin enabled, objects are retained in BloodHound until they've been permanently deleted from AD (after the tombstone lifetime, which defaults to 180 days) plus the configured retention period.
If an object has been deleted due to retention, it won't appear in any zone or label, even if a rule targets it.
**Solution**: Check when the object was last seen by viewing the "Last Seen by BloodHound" attribute in the object's entity panel on the **Explore** page. Review your [data retention](/collect-data/enterprise-collection/data-retention) settings to understand the configured retention period. If the object reappears in the graph during a future data collection, the rule will automatically capture it (assuming the rule is still enabled).
Objects are automatically deleted from the graph if they haven't been observed within the configured retention period. BloodHound stores a timestamp on every object that updates whenever a collection includes that object or references to it. This ensures your data remains fresh and accurate over time.
By default, objects are retained for 7 days after they were last seen. For Active Directory environments with the AD recycle bin enabled, objects are retained in BloodHound until they've been permanently deleted from AD (after the tombstone lifetime, which defaults to 180 days) plus the configured retention period.
If an object has been deleted due to retention, it won't appear in any zone or label, even if a rule targets it.
**Solution**: Check when the object was last seen by viewing the "Last Seen by BloodHound" attribute in the object's entity panel on the **Explore** page. Review your [data retention](/collect-data/enterprise-collection/data-retention) settings to understand the configured retention period. If the object reappears in the graph during a future data collection, the rule will automatically capture it (assuming the rule is still enabled).